DIY Fabric Picture Frame Mats
These DIY fabric picture frame mats are a fun and easy project! With fabric, glue, and a pair of scissors you can transform a plain picture frame into unique, personalized decor in 15 minutes or less.
This post may contain affiliate links. As an Amazon Associate I earn from qualifying purchases.
This project is so easy and that’s part of the reason it’s going viral. I’ve been seeing different versions of these DIY fabric picture frame mats everywhere on social media and thought it would be such a fun addition to my boys’ room.
I’m always on the lookout for an easy DIY project. Especially one that I can flip materials or repurpose what I already have lying around.
This project is great because you can use scrap fabric and picture frames you already own to make a no-cost or low-cost project. Double win!
I used a thrifted men’s shirt for this project because I thought the gingham would be oh-so-cute with these cottagecore style art prints. They’re made by artist Lillian Westfall at Art by Lillian. As soon as I saw these paintings on her Instagram I knew I had to have them!
DIY Fabric Picture Frames
Here’s an overview of easy DIY fabric picture frame mats. Keep scrolling for a detailed material list and an in-depth tutorial with pictures that walk you through each step.
DIY Fabric Picture Frame Mats
Materials
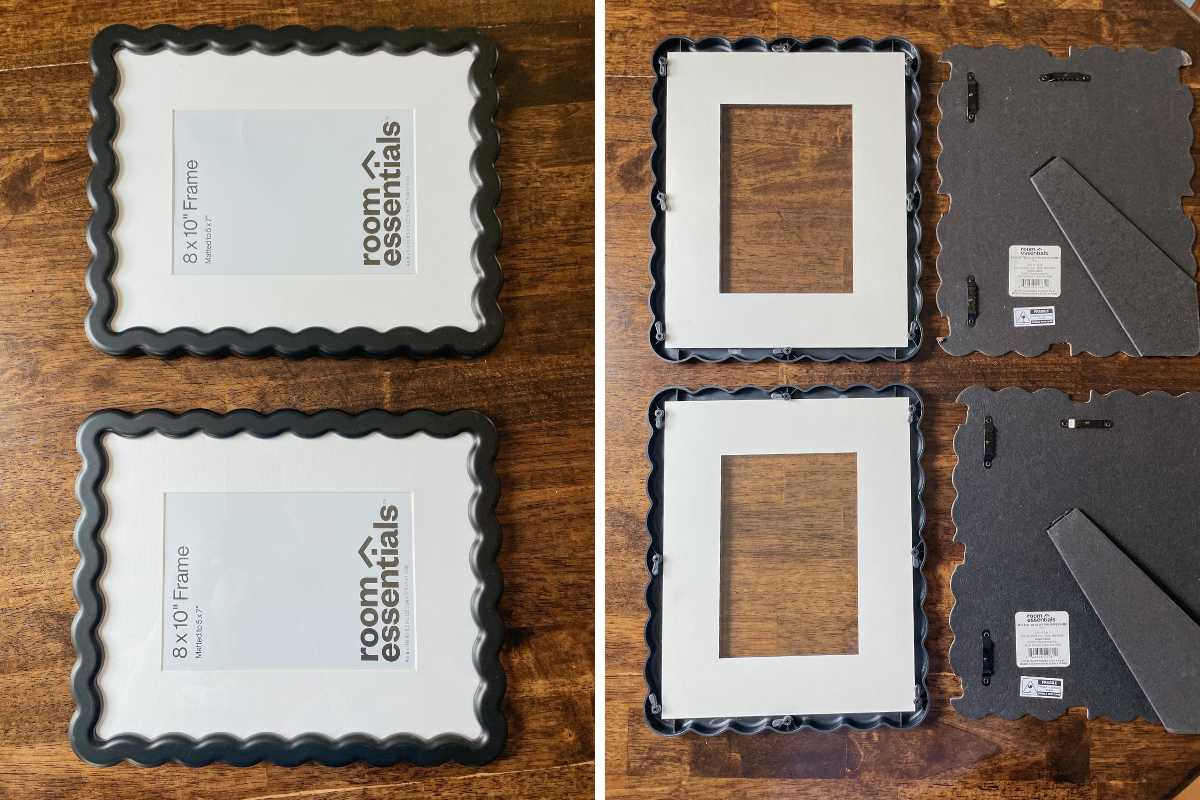
- 2 picture frames with sturdy mats I used 8×10" frames matted to 5×7"
- pair of scissors
- craft glue
- fabric of choice I used a thrifted men's shirt
- hot iron optional, only needed if fabric is wrinkled
Instructions
- Remove mats from frames. Set frames and the backs aside.
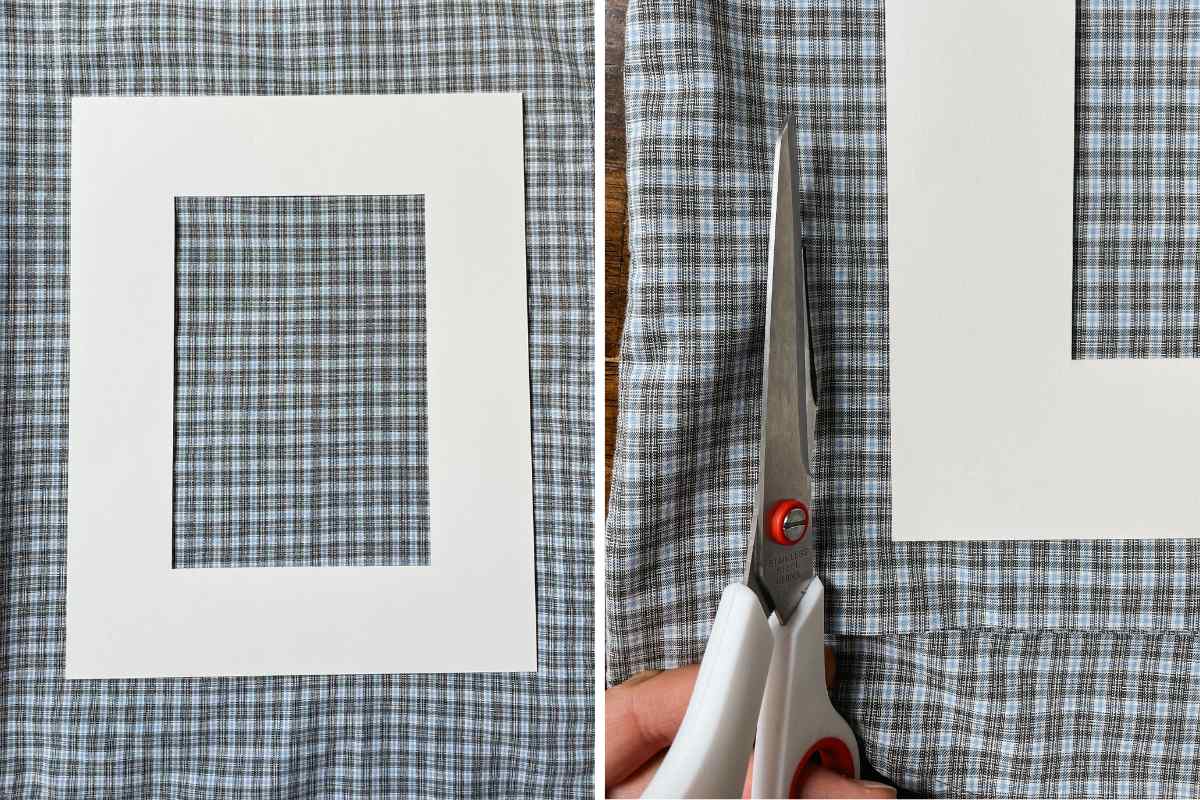
- Flatten fabric (iron it if it is wrinkled) and place mats on top.
- Cut the fabric around the mats, leaving about 1 inch of fabric border around the outside.
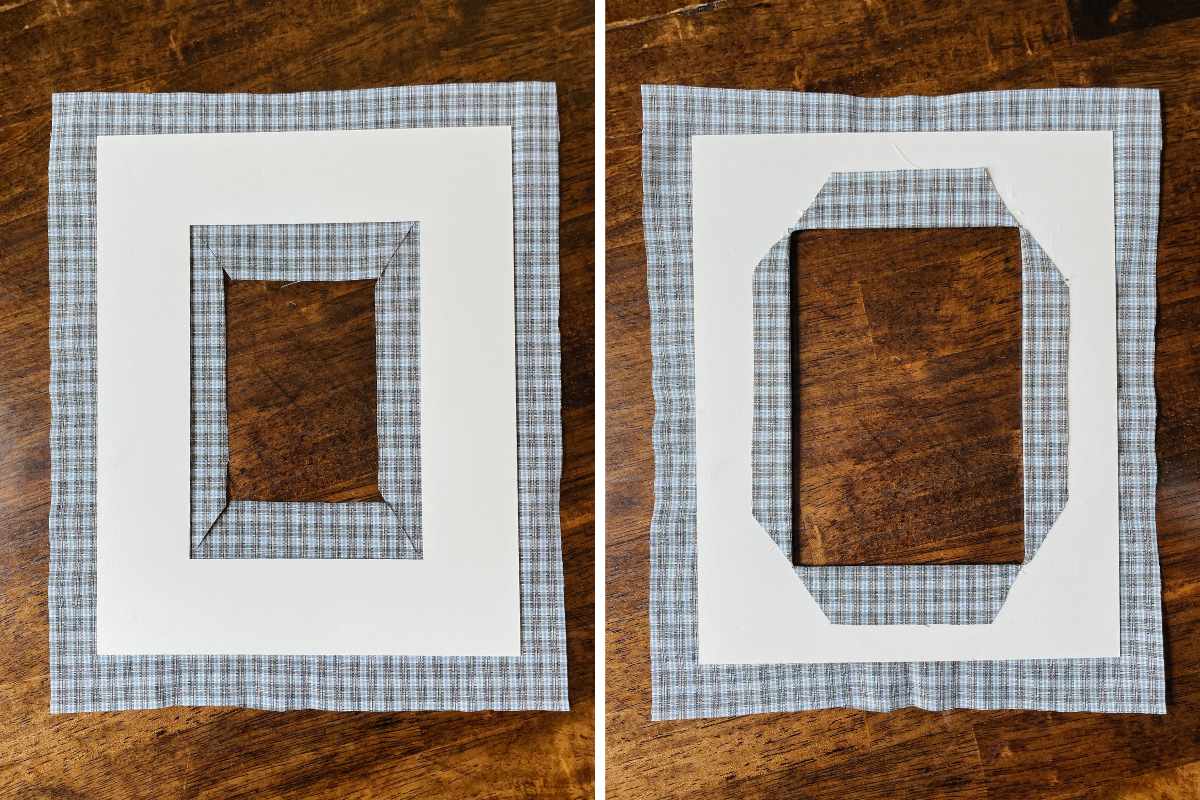
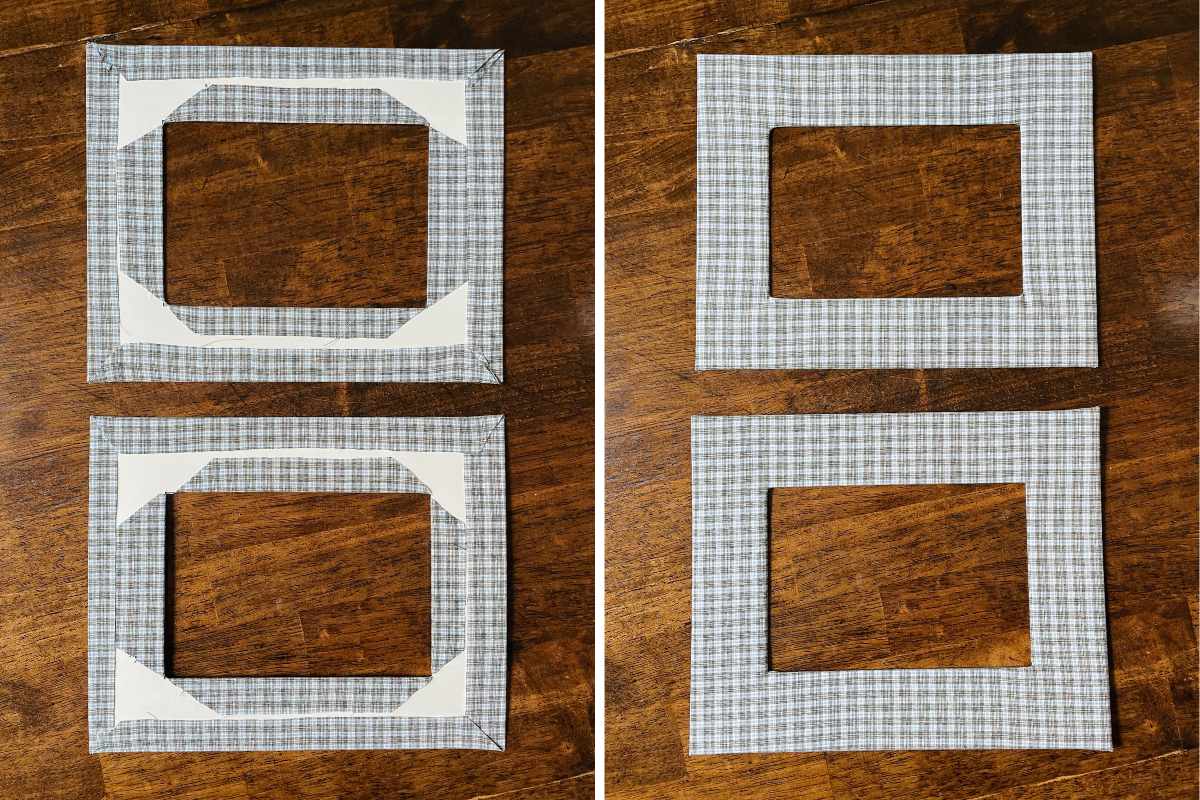
- Snip a hole in the center of the fabric inside the mat. Cut diagonally in an X to each corner. Trim off excess fabric in the center of the mat, leaving about a 1 inch border.
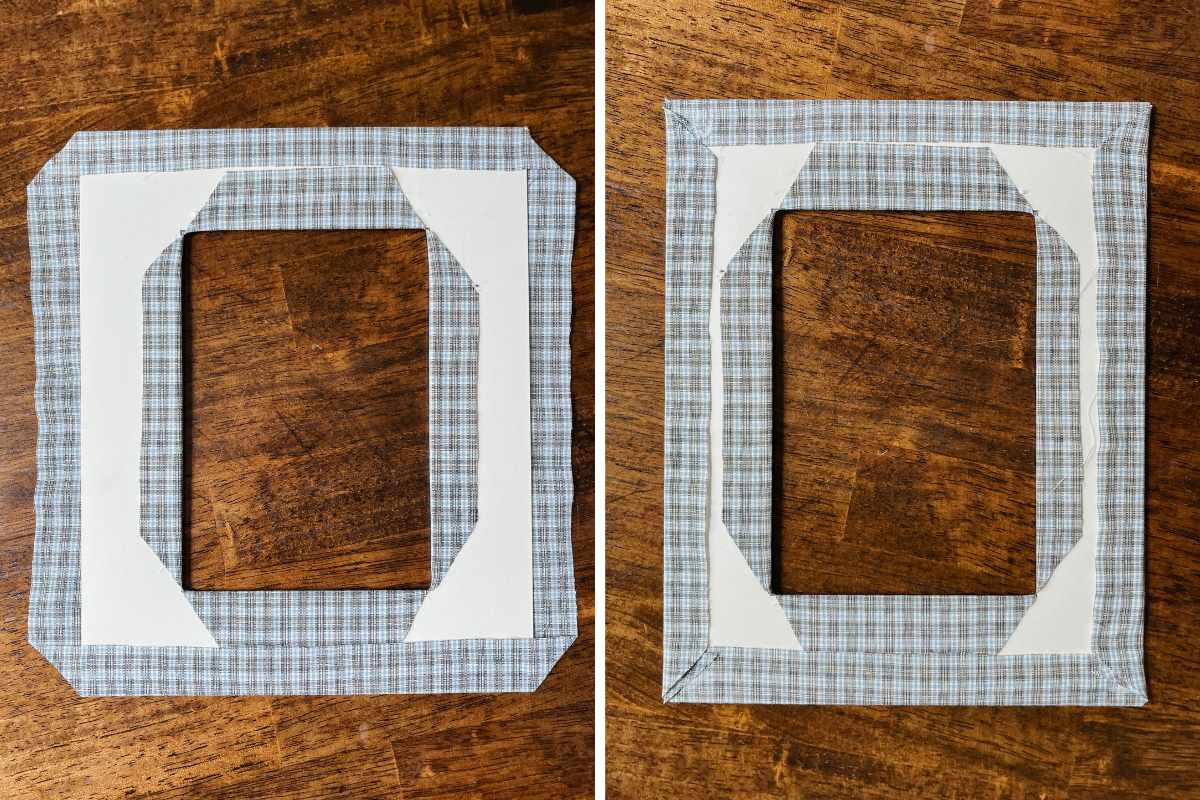
- Place craft glue on the edges of the center of the mat and fold the inner fabric over. Glue each piece by pulling taught but don't stretch it too far.
- Once the center pieces are glued on, trim off the corners of the outside border.
- Add more craft glue to the outer edges of the mats, fold over the fabric, and glue each side down. Press gently to spread out the glue and flatten the fabric.
- Allow glue to fully dry. Place photos or prints back in the picture frame by placing them either above or below the fabric mat. Replace the backs of the picture frames, hang, and enjoy!
Notes
Materials
This project is simple and you can use materials you already have around your house. Here’s exactly what I used:
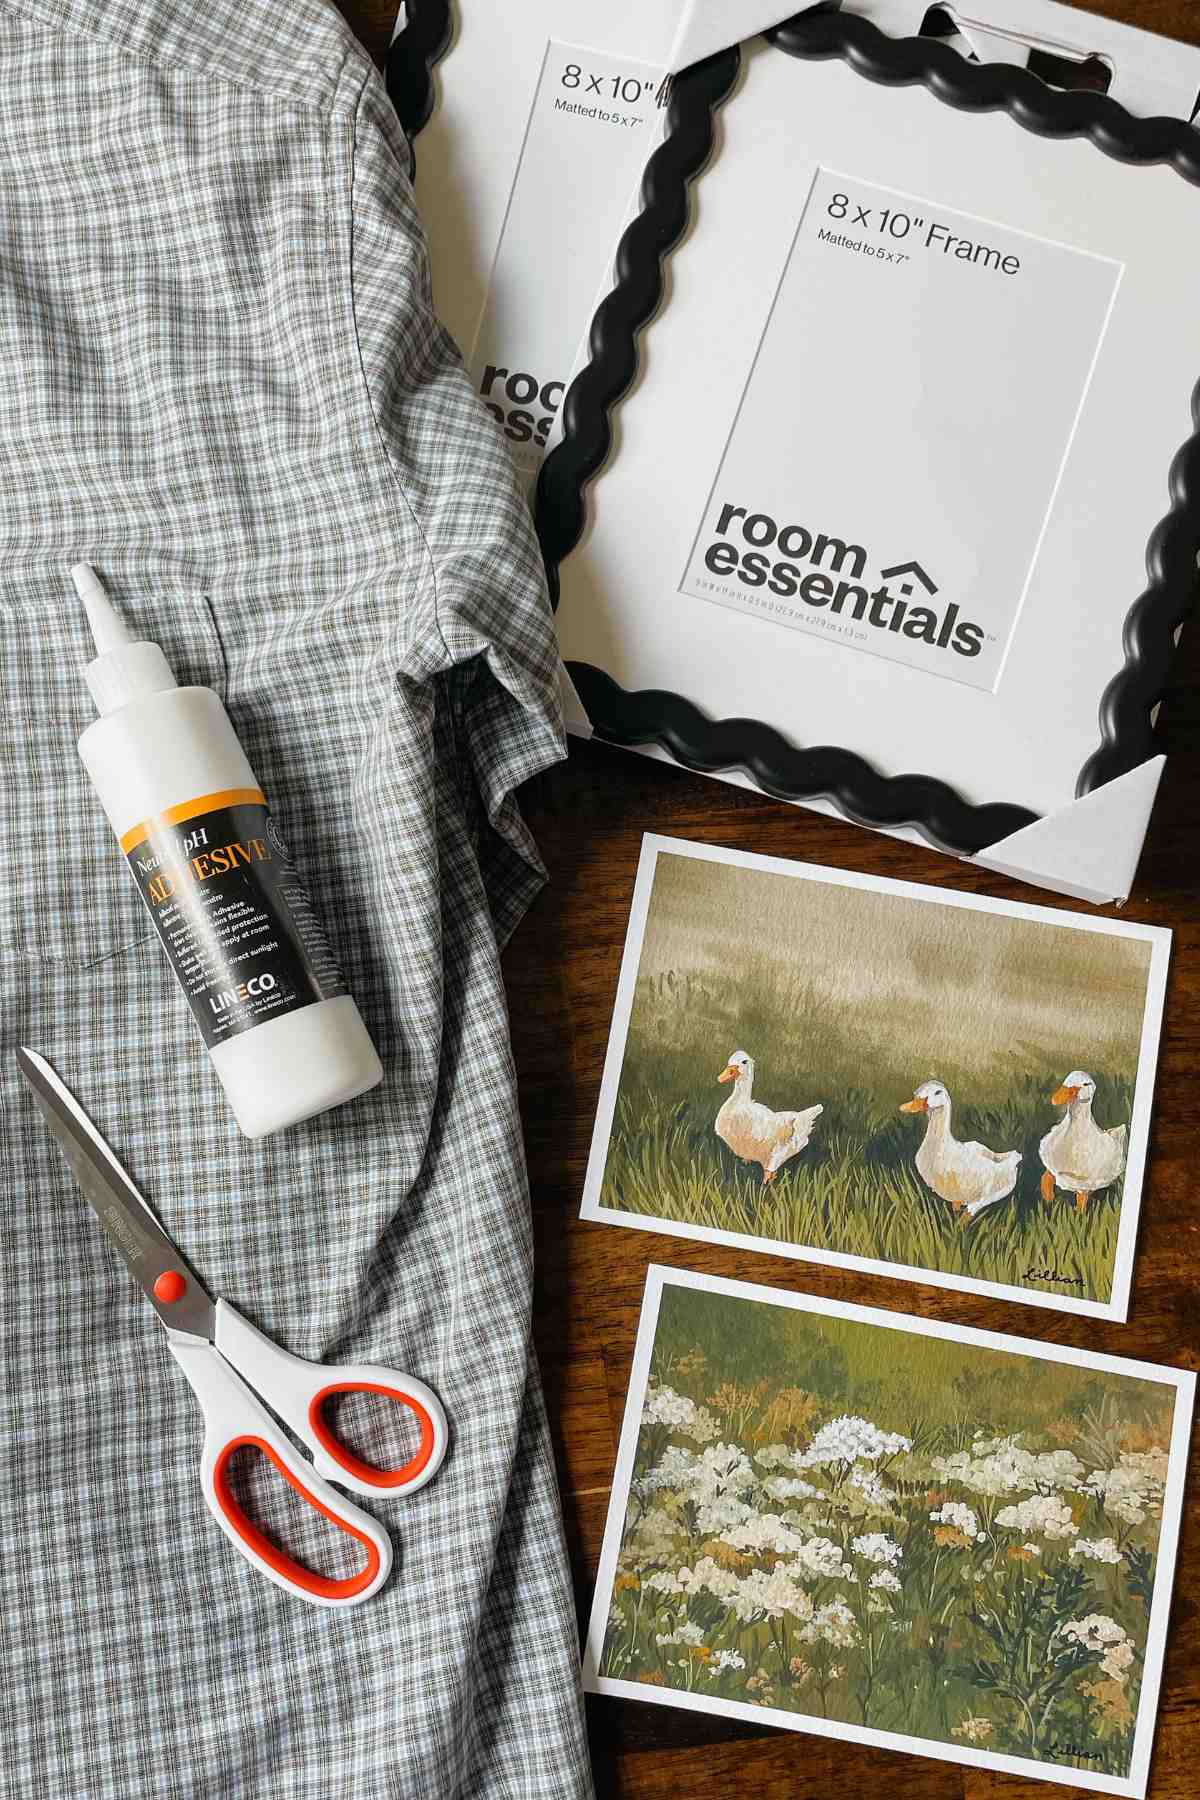
- 2 Picture Frames, size 8×10″ – I loved these wavy picture frames from Target. They’re size 8×10″ with 5×7″ mats. The mats are sturdy while the frames are light-weight. Use any frame you want with a mat.
- Fabric Scissors – Fabric scissors are elite. I love my SINGER fabric scissors and they make cutting any fabric so smooth and precise. Use any sharp scissors you have to cut your fabric.
- Craft Glue – A good all-purpose craft glue is a must for any DIYer. It dries thin and has a great hold. One bottle last forever. Use any glue you have, but I would not recommend hot glue. It dries quickly if you’re trying to position the fabric and can be messy as well as dry bumpy. You want the covered mats to be flat and smooth to be able to fit back into the frames easily.
- Fabric – I used a thrifted men’s button down shirt. You can use any thin fabric you have or go to the thrift store to find a print that catches your eye.
- Art Prints – These art prints from Art by Lillian are size 5×7″ and fit perfectly in the frames.
Featured Art Prints
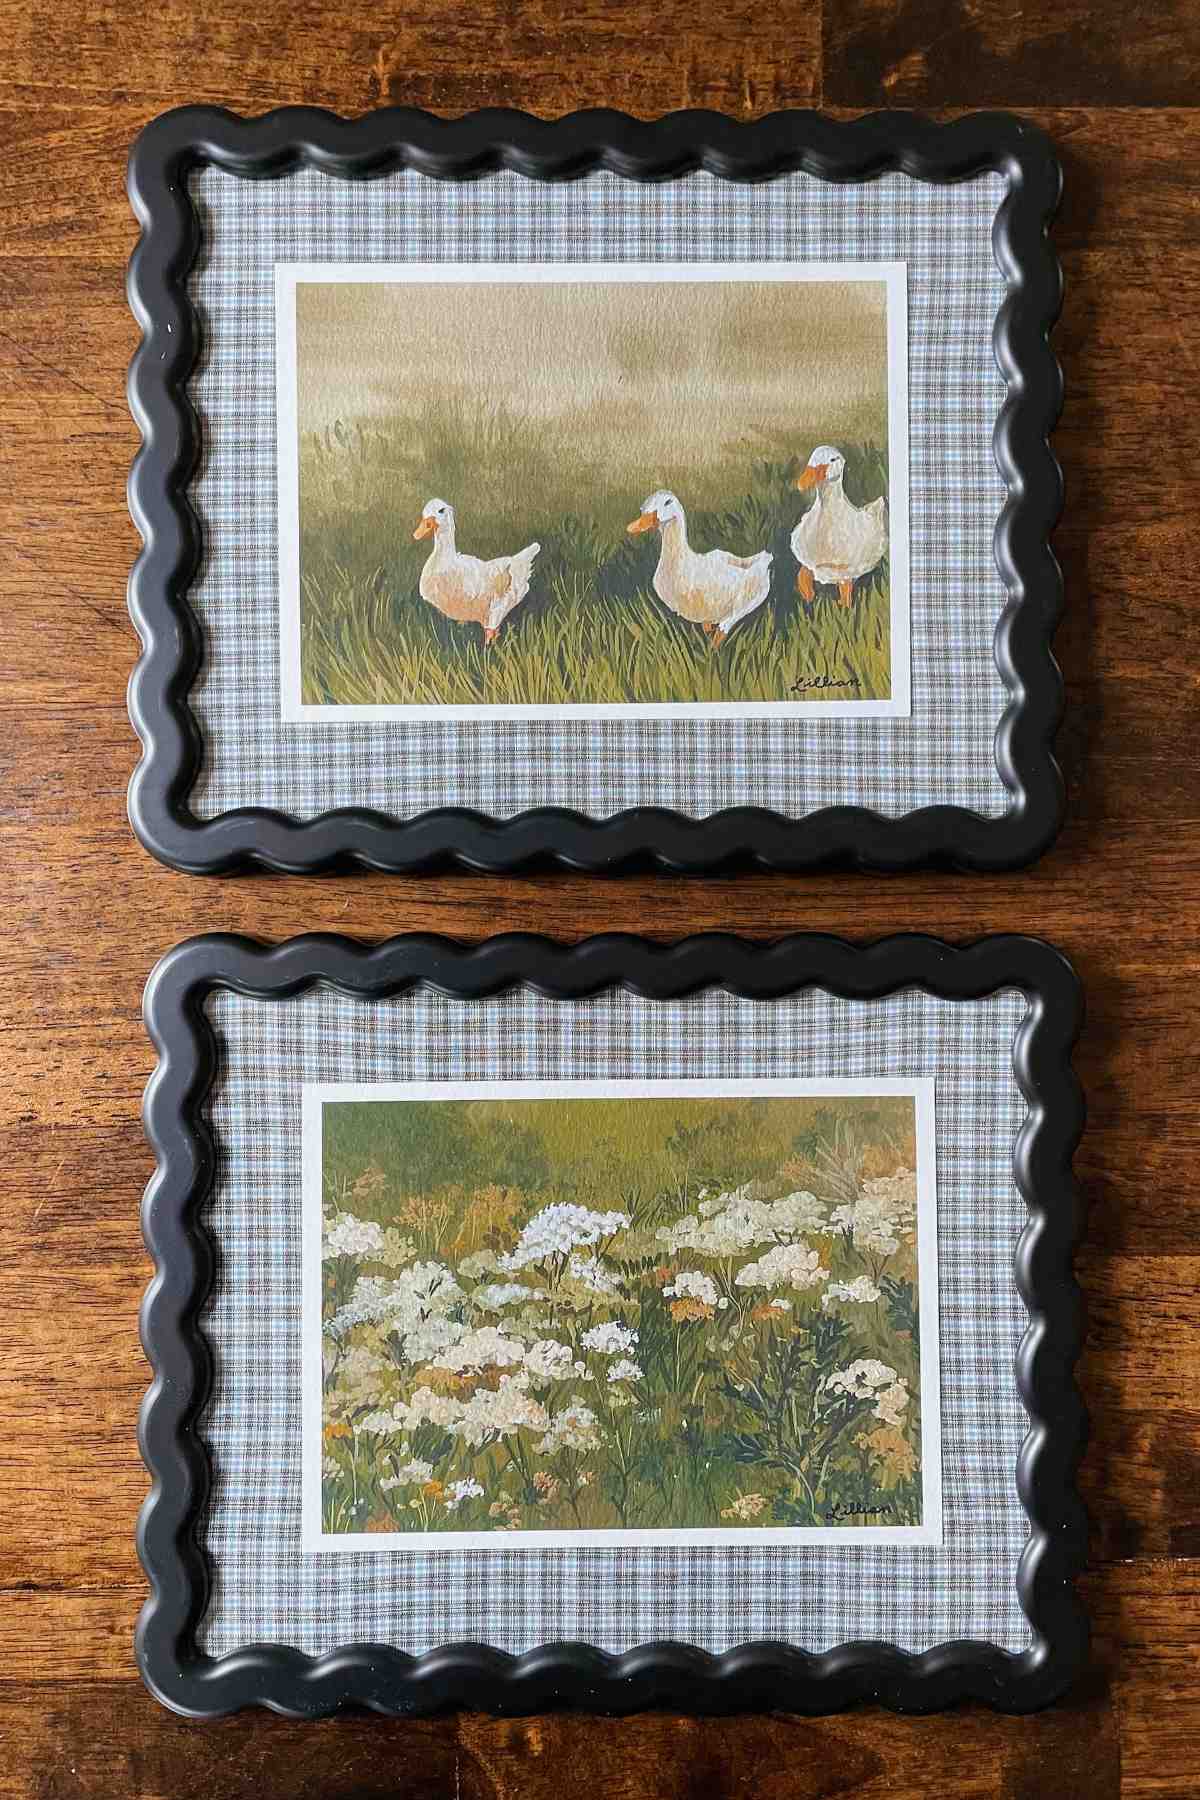
These gorgeous art prints inspired this entire project! The titles of each piece are “Farmyard Wander” and “Queen Anne.” I purchased them from Lillian after seeing them on her Instagram. They are even more beautiful in person! You can purchase these prints by Lillian here.
I thought they would be perfect for my boys’ room. I often feel like a mother duck with my little boys trailing along behind me in our outdoor adventures. They instantly captured my heart!
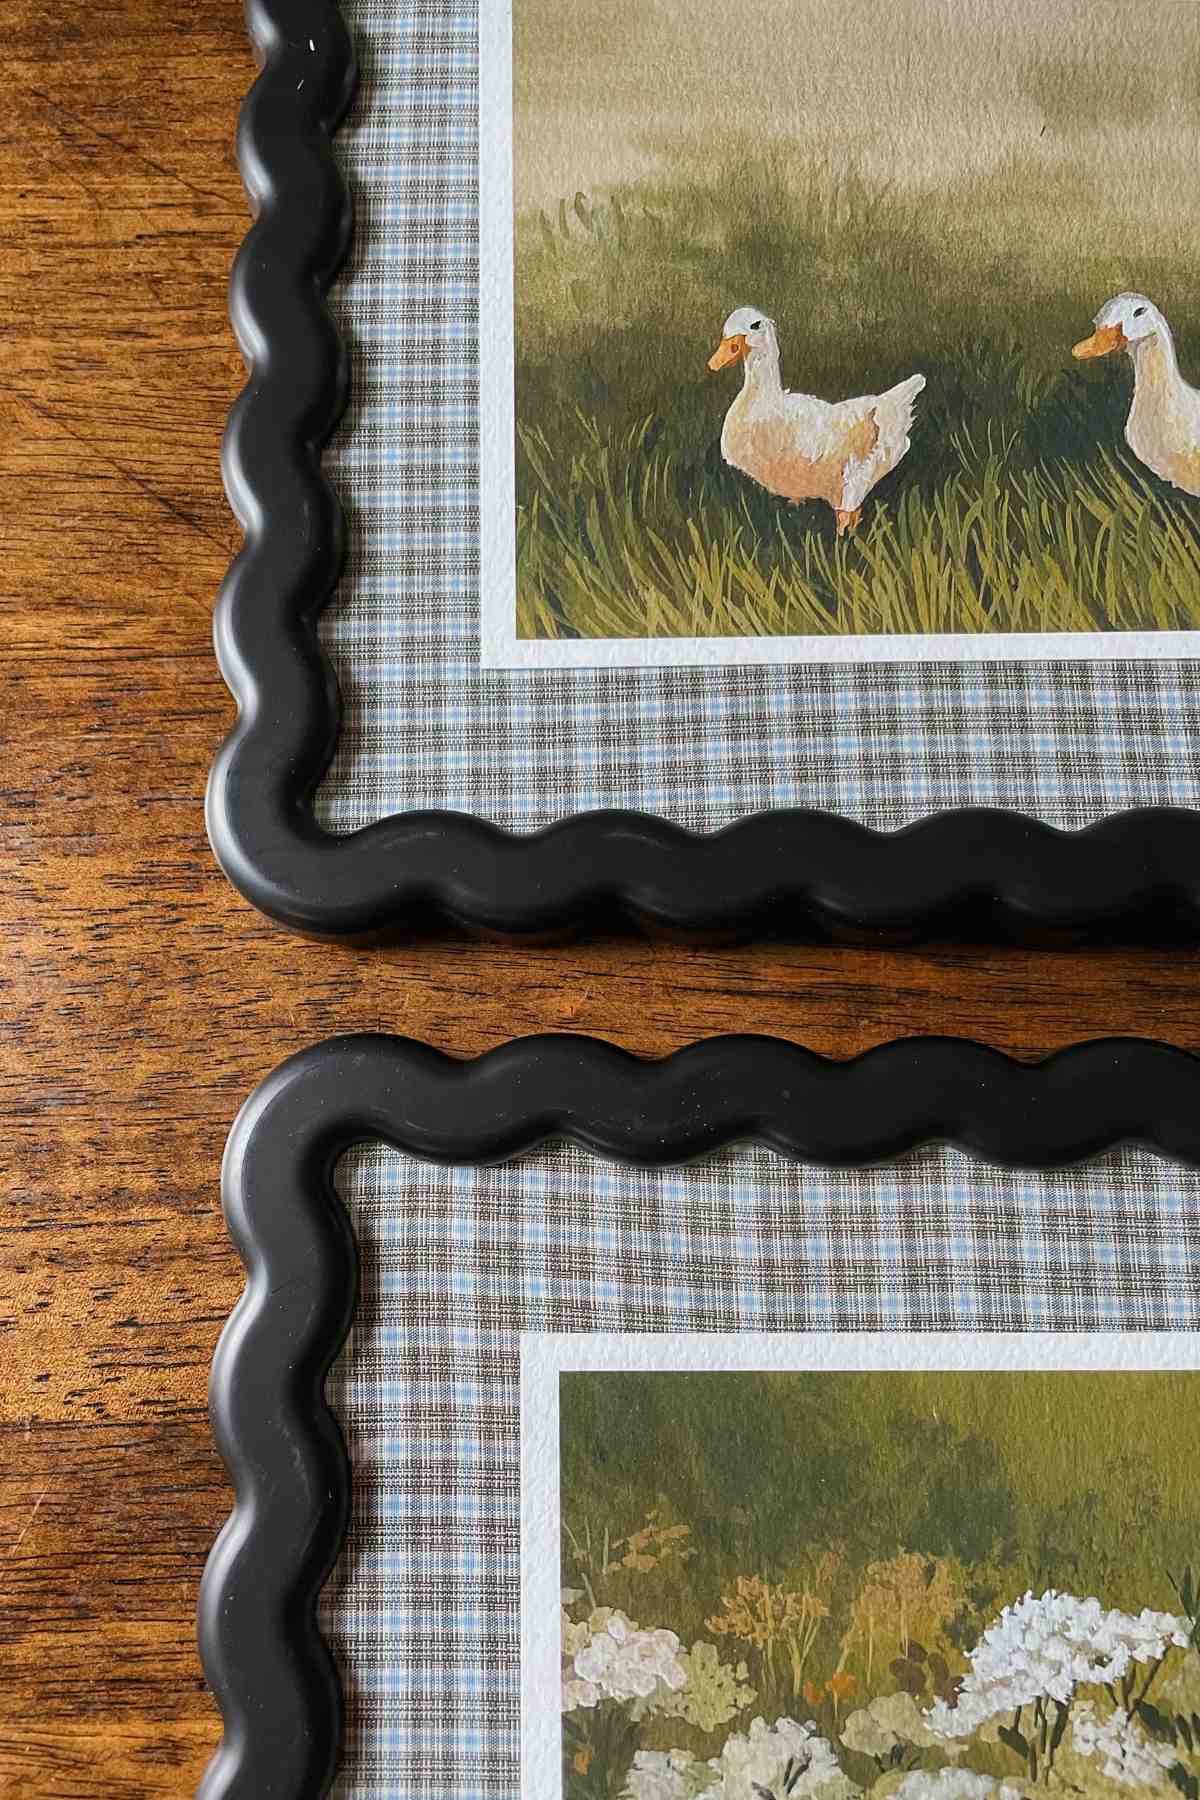
When they arrived, I knew I wanted to mat them in a larger frame. I thought some gingham fabric and a wavy frame would be a fun way to compliment the colors and tie in a more boy-ish, playful feel for a child’s room. I’m delighted with how they turned out.
How to Make Fabric Picture Frame Mats (Step by Step)
This is a simple, step-by-step breakdown of how to make fabric picture frame mats.
Step 1: Remove mats from frames. Set the frames and the backs aside.
Step 2: Flatten the fabric. Iron it if it’s wrinkled. You need the fabric to be smooth so it lays and glue evenly. Place mats on top of the fabric and line it up with the fabric’s pattern.
Step 3: Cut the fabric around the mats, leaving about 1 inch of fabric border around the outside.
Step 4: Using the tip of scissors, snip a hole in the center of the fabric inside the mat. Cut diagonally in an X to each corner. Trim off the excess fabric in the center of the mat, leaving about a 1 inch border in the center of the mat.

Step 5: Start in the center. Place craft glue on the edges of the center of the mat and fold the inner fabric over. Glue each piece by pulling it taught but don’t stretch it too far.
Step 6: Once the center pieces are glued on, trim off the corners of the outside border. You want as little overlapping fabric as possible so the mat remains thin and lies flat in the frame.
Step 7: Add more craft glue to the outer edges of the mats, fold over the fabric, and glue each side down. Press gently to spread out the glue and flatten the fabric.
Step 8: Allow the glue to fully dry. Once dry, place your choice of photos or art prints back in the picture frame by placing them either above or below the fabric mat. Replace the backs of the picture frames, hang, and enjoy!
Options for Placing Prints
There are two options for using fabric picture frame mats. You can place your photos or art prints either in front of or behind the mats in the frame for different looks. Here’s what I mean:
Option 1: In Front of Mats
For these art prints I liked the contrast of the white border against the gingham. I thought it made them pop and so I decided to layer them in front of the mats.
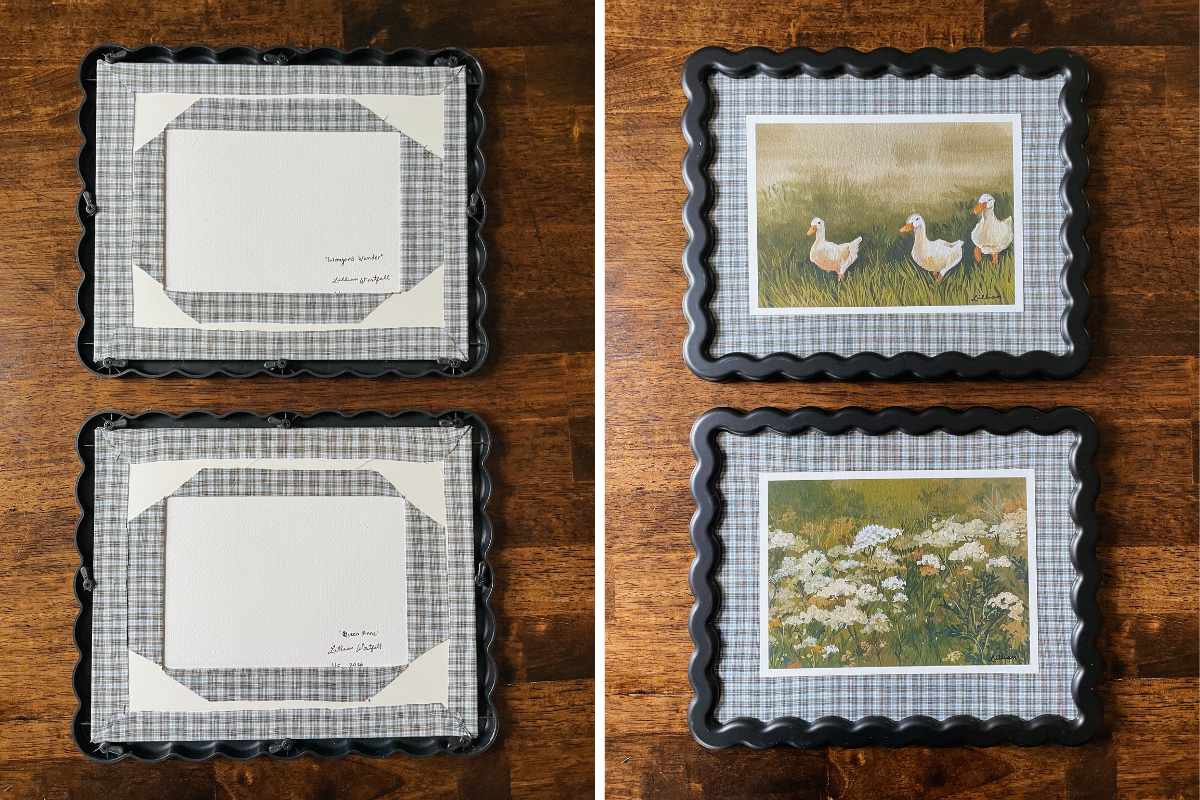
Option 2: Behind Mats
This option is a more classic matted frame look where the art prints are behind the mats. Also so cute!
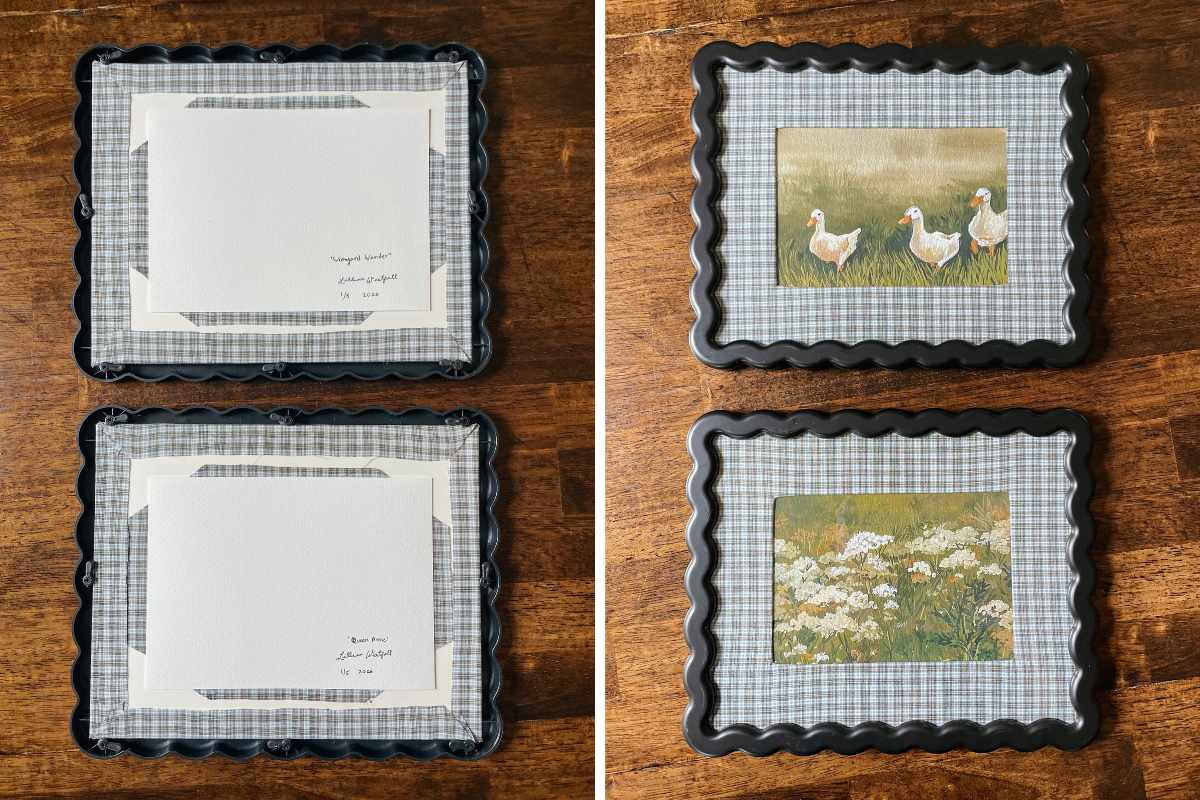
With deciding how to layer photos or art prints, either way works! It depends on your preference and the look you’re going for. Play around with each option and see which one you like better.
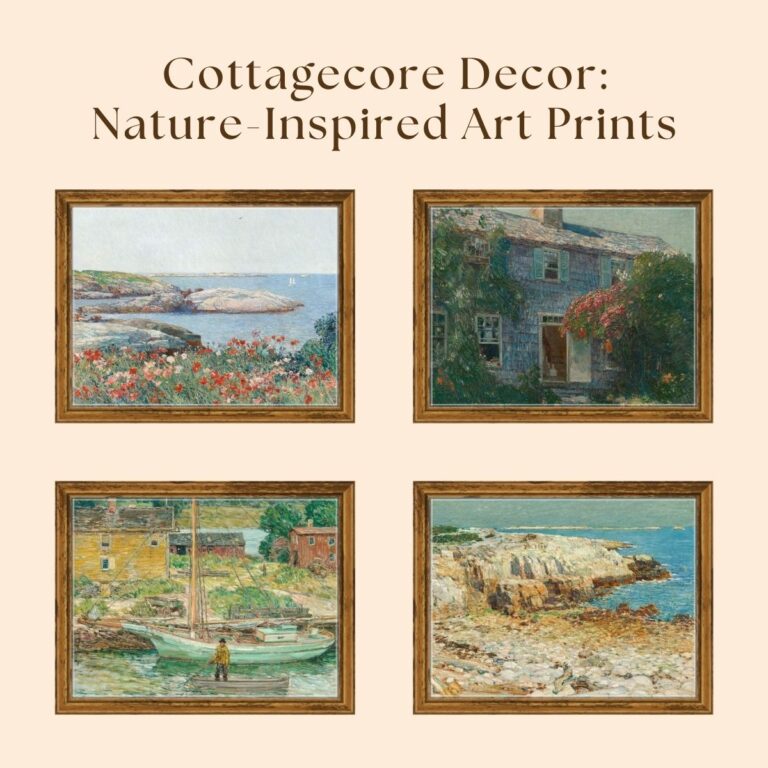
Free Art Prints
If you’re looking for free art prints, check out my collection of free vintage printable wall art. It includes cottagecore decor, cowboy prints, western landscapes, and coastal wall art just to name a few.
All of my printables are free to download and print. They are sized 8×10″. So be sure to adjust down the size to 5×7″ before printing if you want to frame them in an 8×10″ frame. Or use an 11×14″ frame matted down to 8×10″ to keep them the original size.
Fabric Frame Mats: Simple & Charming DIY Project
Making your own fabric picture frame mats is such a simple, fun project. They add charm and character to any space. I love how they add texture to a room and can even be swapped out seasonally.
I hope this tutorial was helpful! Feel free to ask me any questions you have in the comments and I’ll get back to you soon. And be sure to share what project you made with your own DIY fabric picture frame mats!


those are just absolutely gorgeous! I love this style you put together!