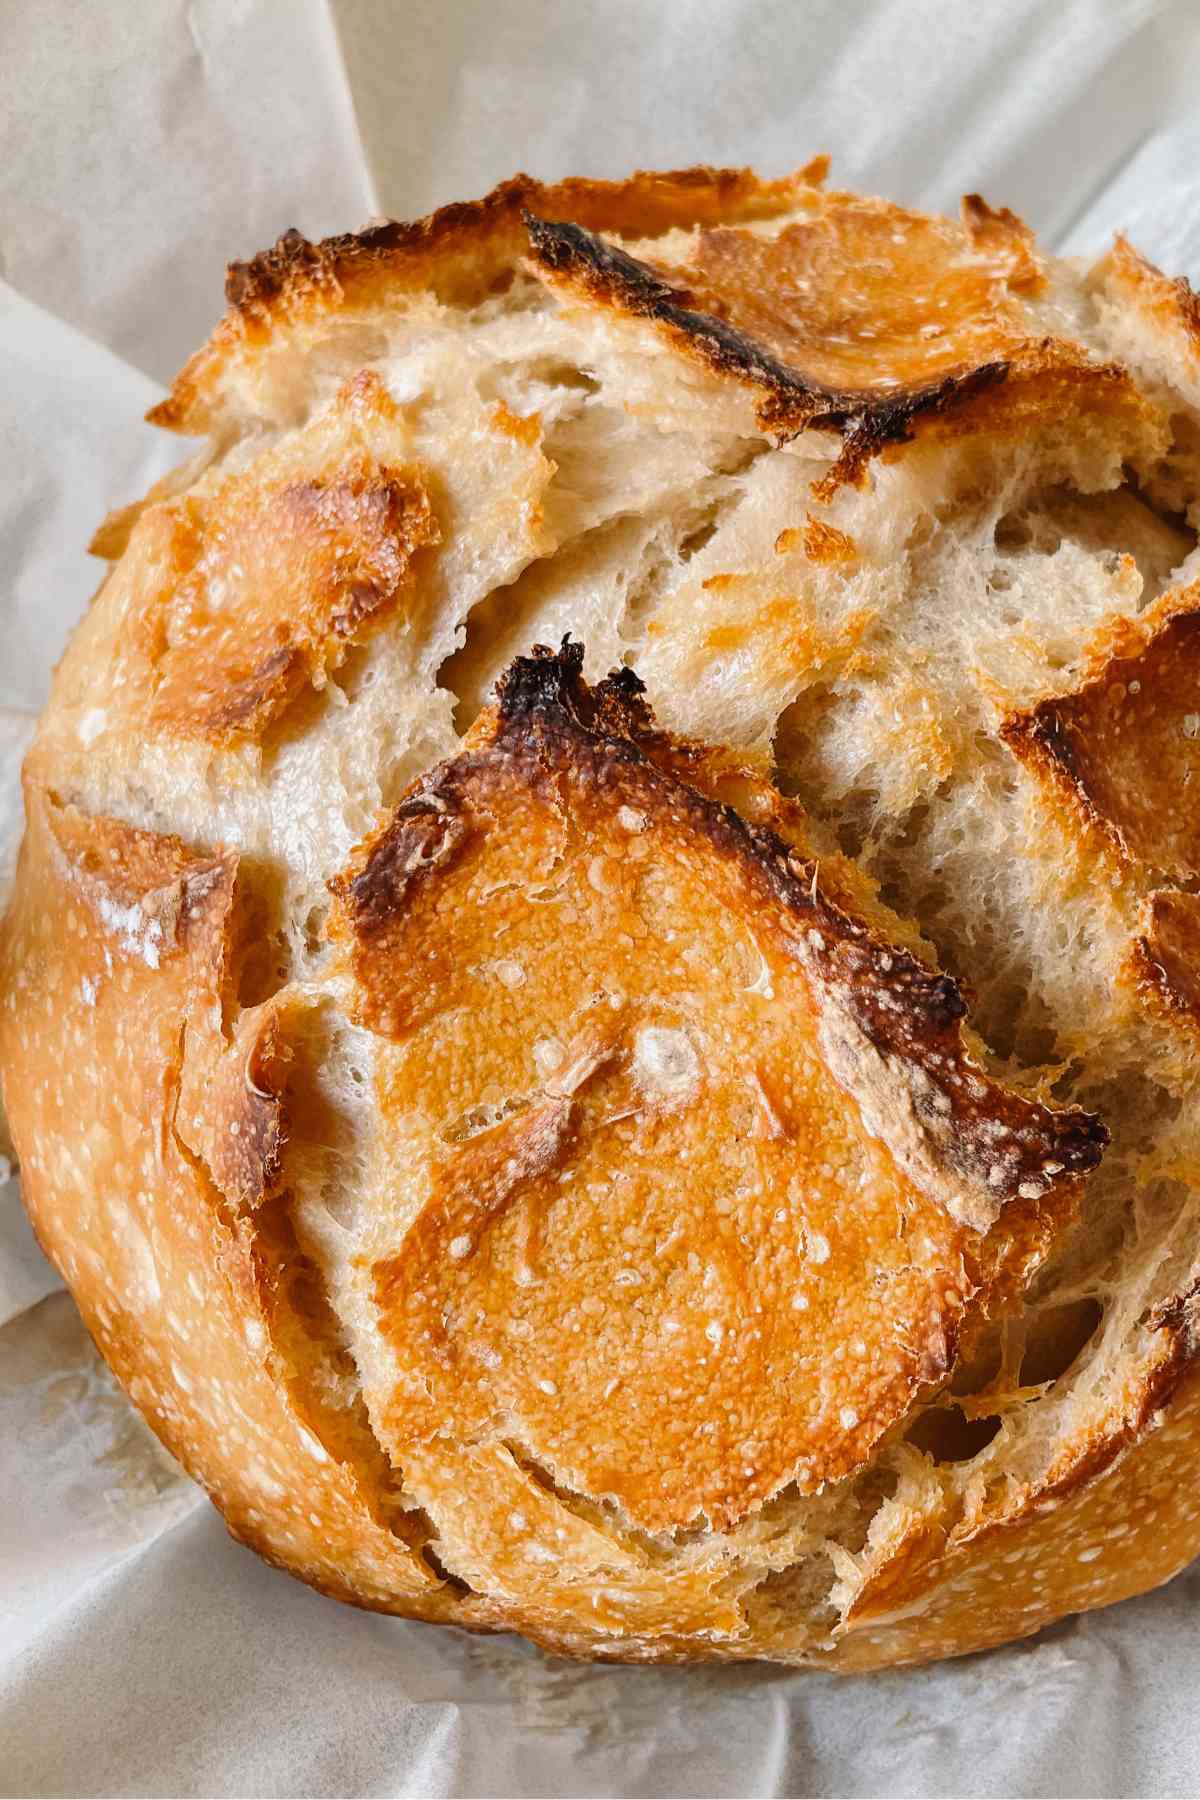
Unloaf Sourdough Bread Recipe
This easy unloaf sourdough bread recipe is perfect for the everyday sourdough baker.
This recipe uses unfed sourdough starter (also known as sourdough discard). There are no stretch and folds. There is no preheating an oven or Dutch oven. It’s truly as simple as sourdough bread can get.
Scroll down for the recipe card, followed by detailed step-by-step instructions (with photos).
This post may contain affiliate links. As an Amazon Associate I earn from qualifying purchases.
If you like this recipe. you’ll love my Sourdough Cinnamon Roll Focaccia and my Sourdough Apple Fritter Focaccia. They are both simple sourdough recipes that anyone can make.
Unloaf Sourdough Bread Recipe
Unloaf Sourdough Bread Recipe
Equipment
- Large mixing bowl
- Kitchen scale
- Dough whisk or spoon
- Wax paper or tea towel
- Medium mixing bowl
- Parchment paper
- Dutch oven
- Sharp knife (for scoring)
Ingredients
- 165 g starter unfed, flat, hungry or recently fallen (also considered discard)
- 400 g water
- 650 g unbleached flour
- 15 g salt
Instructions
Mix Dough
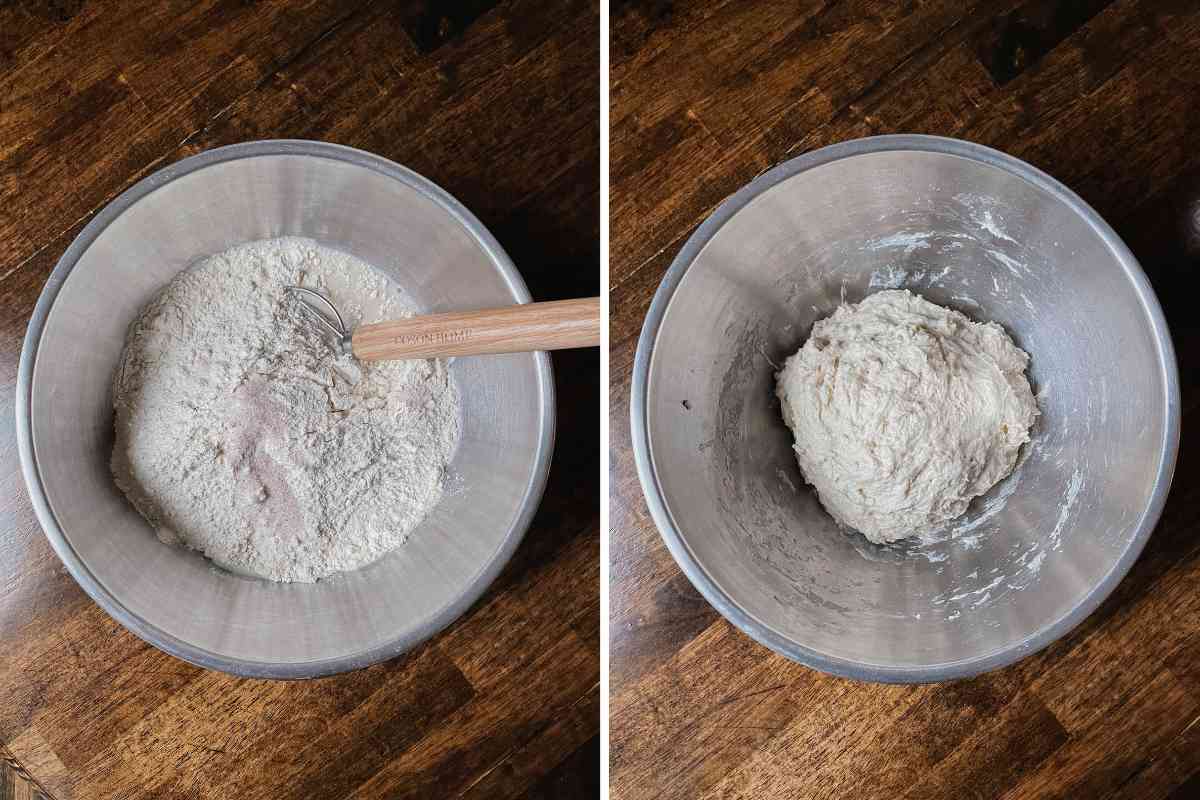
- Mix water and unfed starter together in a large bowl. Whisk to combine. Add flour and salt and mix to form dough.
- Cover bowl with damp kitchen towel. Bulk ferment on counter at room temperature 3-12 hours (or overnight) until dough has risen 50%-75% of its original size. Length of time will depend on the temperature of your kitchen.
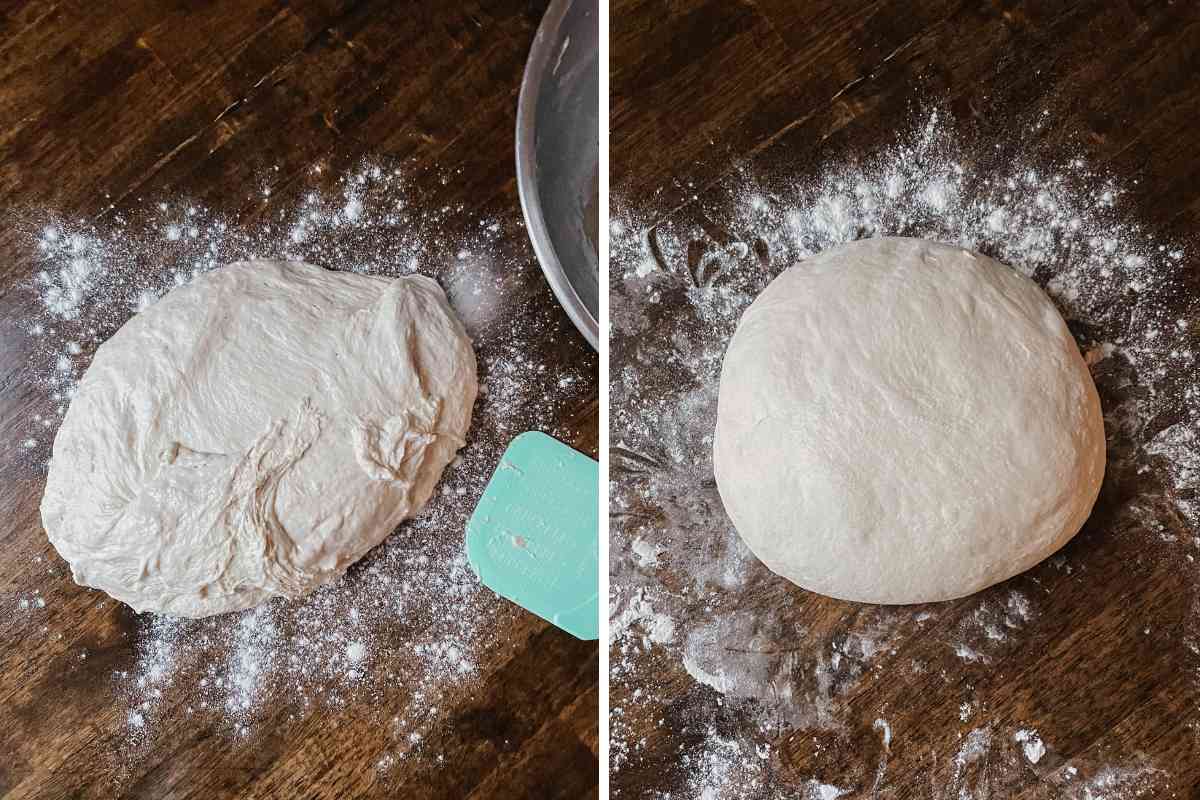
- Once fermented, turn dough out onto a lightly floured surface. Shape dough into a ball.
- Option #1 – Bake Immediately: Place dough onto parchment paper, score top with a sharp knife, and place into a cold Dutch oven. Continue with baking instructions below.
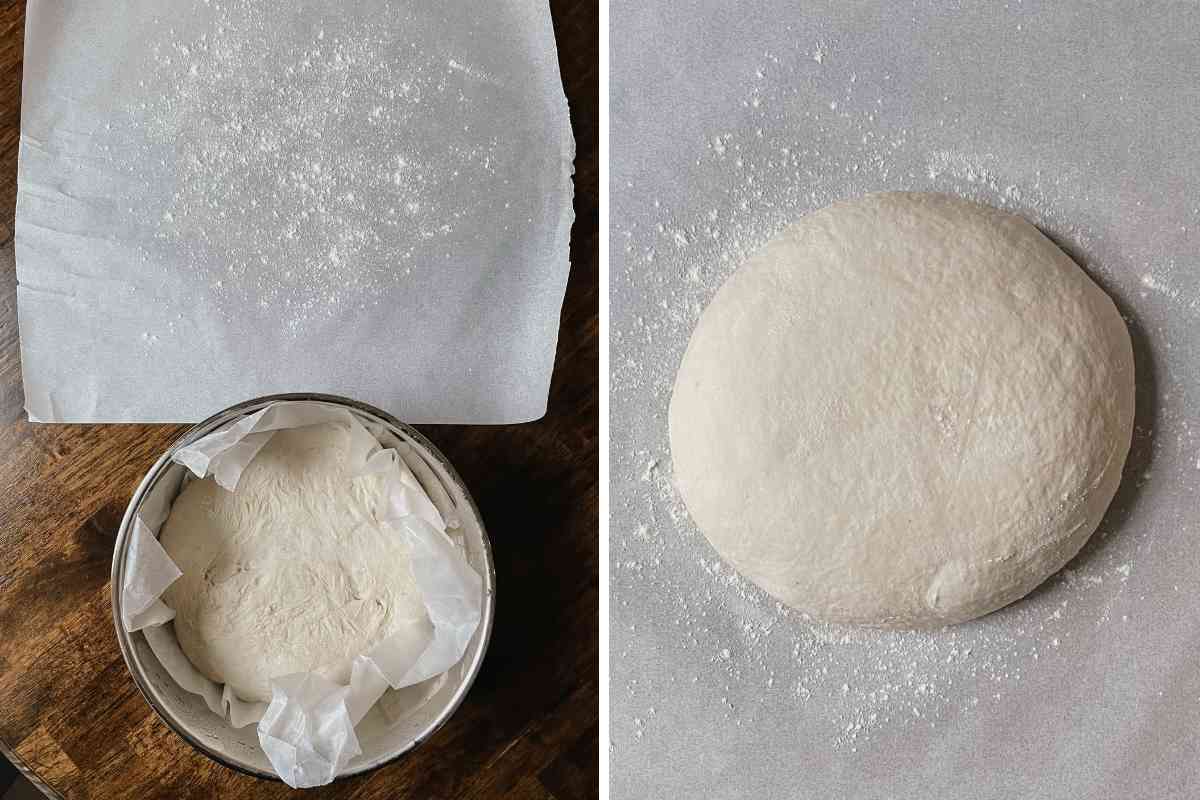
- Option #2 – Cold Proof in Refrigerator: Place dough onto wax paper or floured tea towel and place in a medium size bowl (slightly larger than the ball of dough). Cover bowl with a damp kitchen towel and place in fridge for up to 24 hours.
Bake Dough
- When ready to bake, place dough on parchment paper and score the top. I like to do a simple 'X' with this recipe. Place dough in a cold Dutch oven and cover with lid. Then place the cold Dutch oven into a cold oven (no preheating). Set the oven temperature to 450℉ and set a timer for 1 hour.
- When the timer goes off, lower the temperature to 425℉ and remove the lid. Bake for another 10-15 minutes until the top is browned or until the internal temperature reads 205-210°F (96-99°C) with an instant read thermometer.
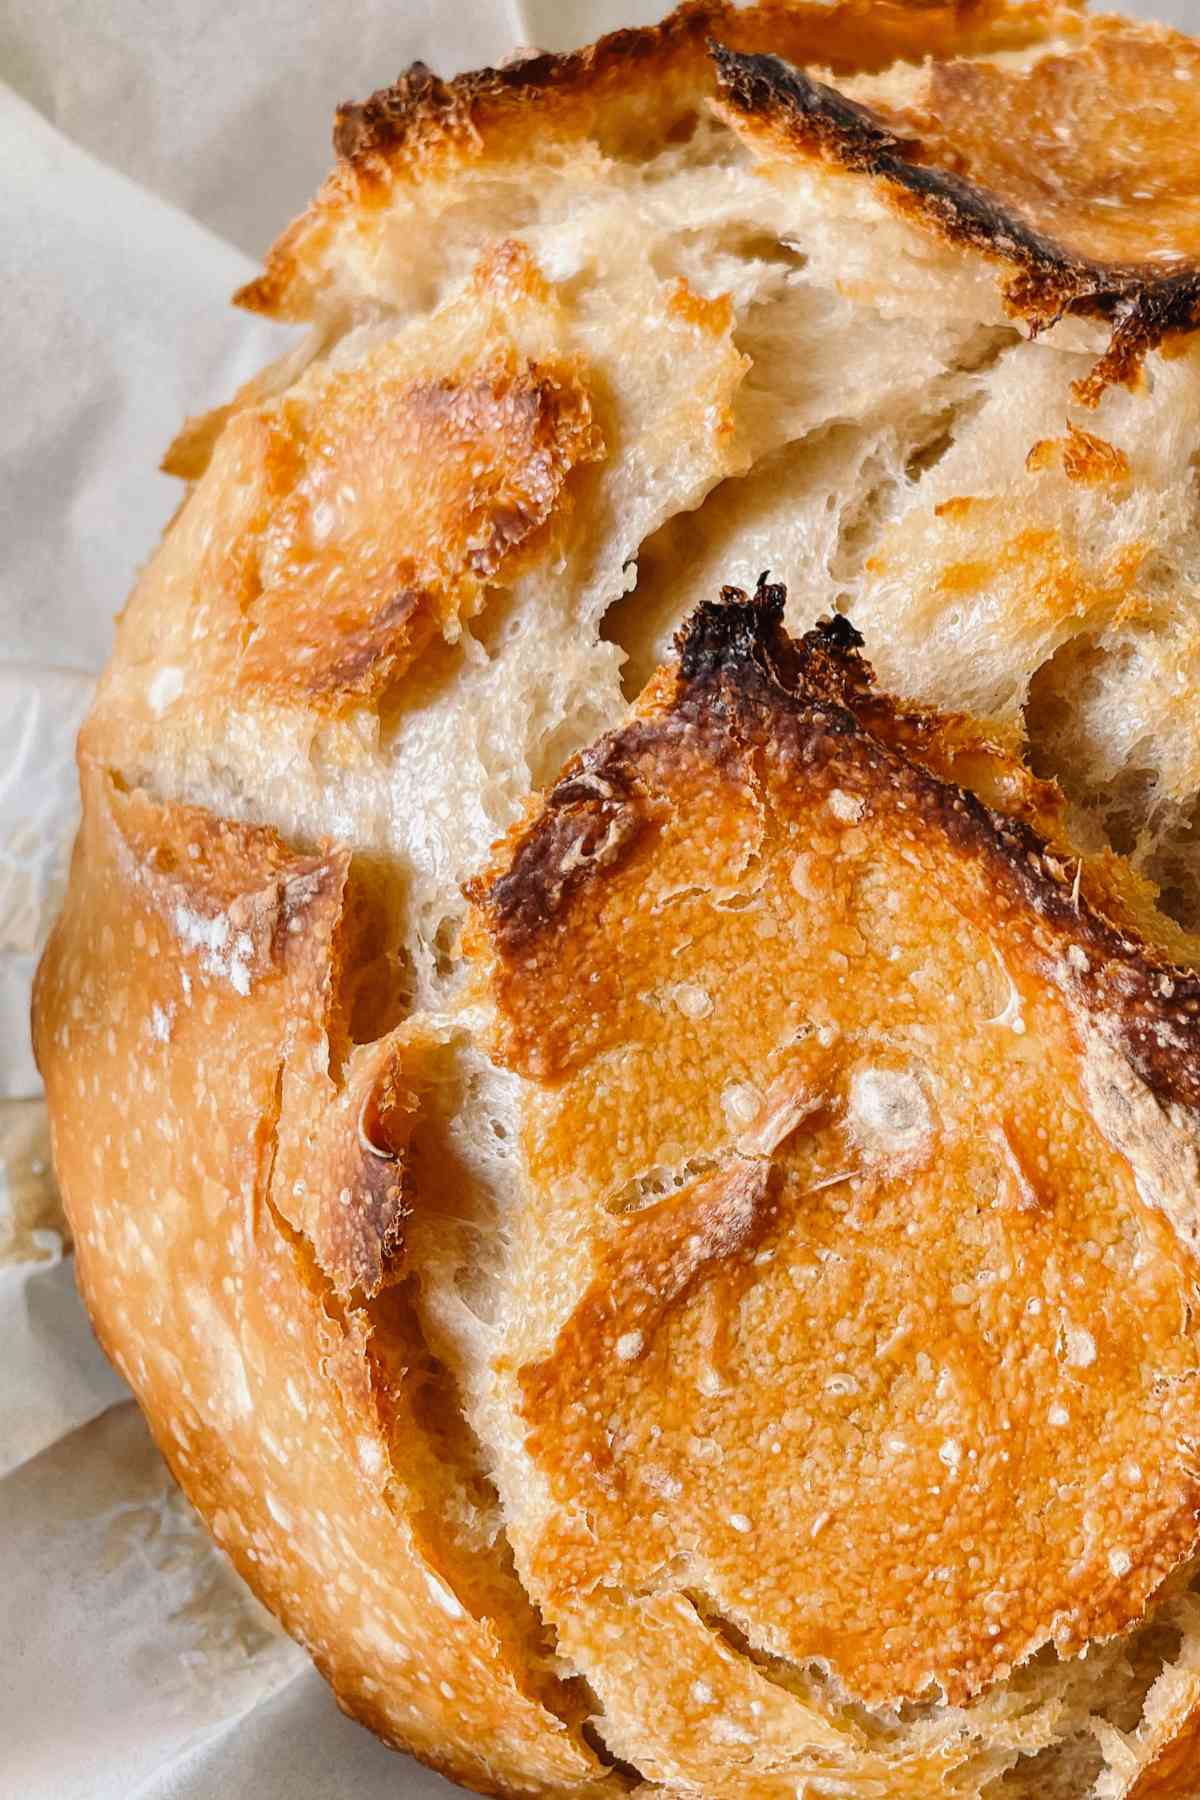
- Remove the bread from the oven and place on a wire rack to cool. Once fully cooled, slice and enjoy!
Notes
Why you’ll love this recipe
It is the easiest sourdough bread recipe out there! It’s perfect for the lazy sourdough baker, anyone running short on time, or those of us who just want to mix up dough and go to bed. It’s a no-fuss, rustic sourdough bread recipe that skips all the stress. It turns out beautiful and delicious without any extra time or hassle!
Why is it called “unloaf” sourdough bread?
This method of making sourdough bread is called unloaf because many aspects of sourdough bread that are seen as “rules” are un-done in this method. This method uses unfed starter, untouched dough, and an unheated oven.
Unfed Starter – This recipe uses flat, hungry, or recently fallen sourdough starter. It doesn’t call for active, bubbly starter as many other sourdough bread recipes do.
Untouched Dough – This recipe does not call for stretch and folds. Or any fancy folding or kneading the dough. You simply let it sit.
Unheated Oven – There is no preheating an oven or Dutch oven. You place a cold Dutch oven into a cold oven and then turn the oven on.
Versions of this unloaf sourdough bread recipe have been floating around on Reddit threads and sourdough Facebook groups for a while. Multiple sourdough social media influencers have done their own take on this method. No one is quite sure of the “original creator” of this method. But it’s safe to assume for as long as humans have been making bread, a version of the unloaf sourdough bread method has been used.
Sourdough Unloaf Bread Ingredients
This easy unloaf sourdough bread recipe calls for the basic 4 ingredients: sourdough starter, water, flour, and salt.
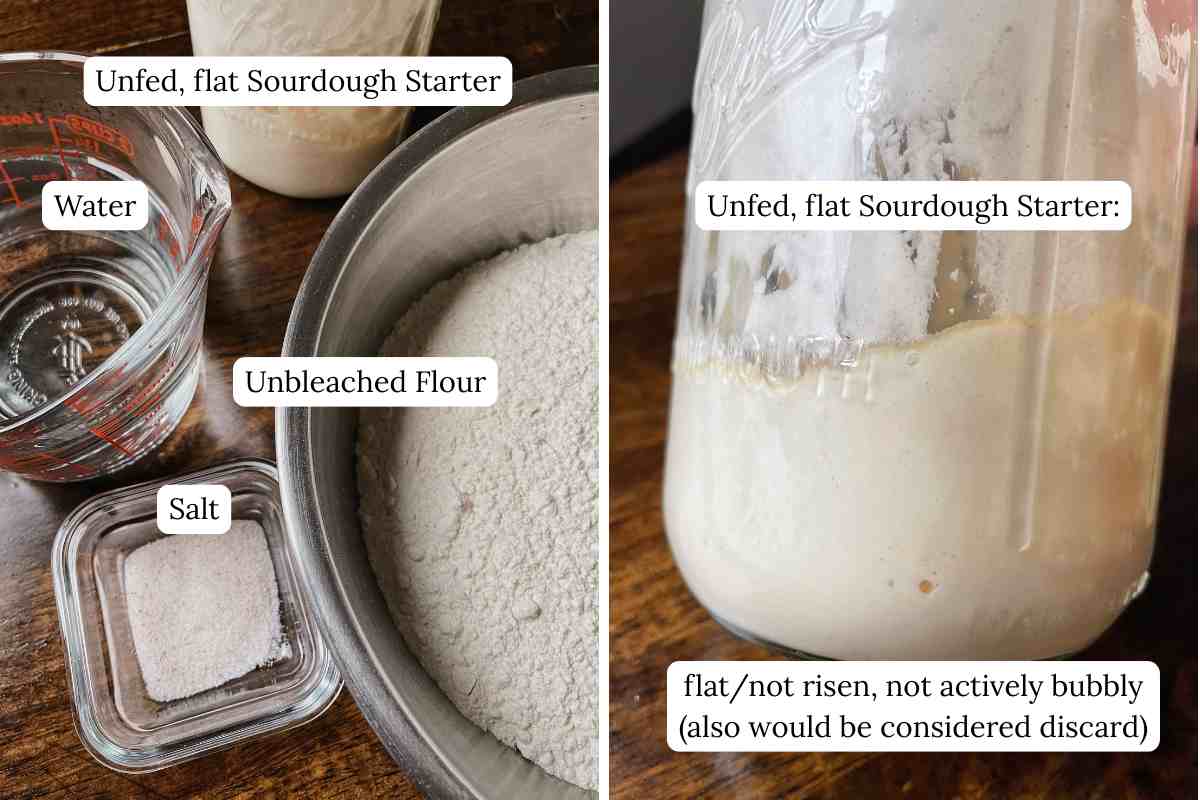
- Sourdough Starter – For this recipe, you need flat, unfed, hungry starter (also considered sourdough discard). This is starter that has not been fed recently and is not actively bubbly.
- Water – It can be cold water or warm.
- Flour – Unbleached flour is preferred. I like the organic King Arthur flour.
- Salt – Any is fine. I like Redmond Real Salt.
The full ingredient list with exact amounts can be found in the recipe card above.
How to Make Unloaf Sourdough Bread: Step-by-Step (With Photos)
This step-by-step includes the steps for cold proofing in the refrigerator after the bulk fermentation. You can skip the cold proof and go straight to baking after Step 3 if you wish. Simply follow Steps 1, 2, and 3 and then place the dough onto parchment paper in a cold Dutch oven, score the dough, and place in a cold oven. Continue to follow baking instructions.
Step 1: Mix Dough – In a large mixing bowl, combine flat, unfed sourdough starter and water. Whisk to combine until starter is evenly dissolved. Here is the Danish dough whisk pictured here.
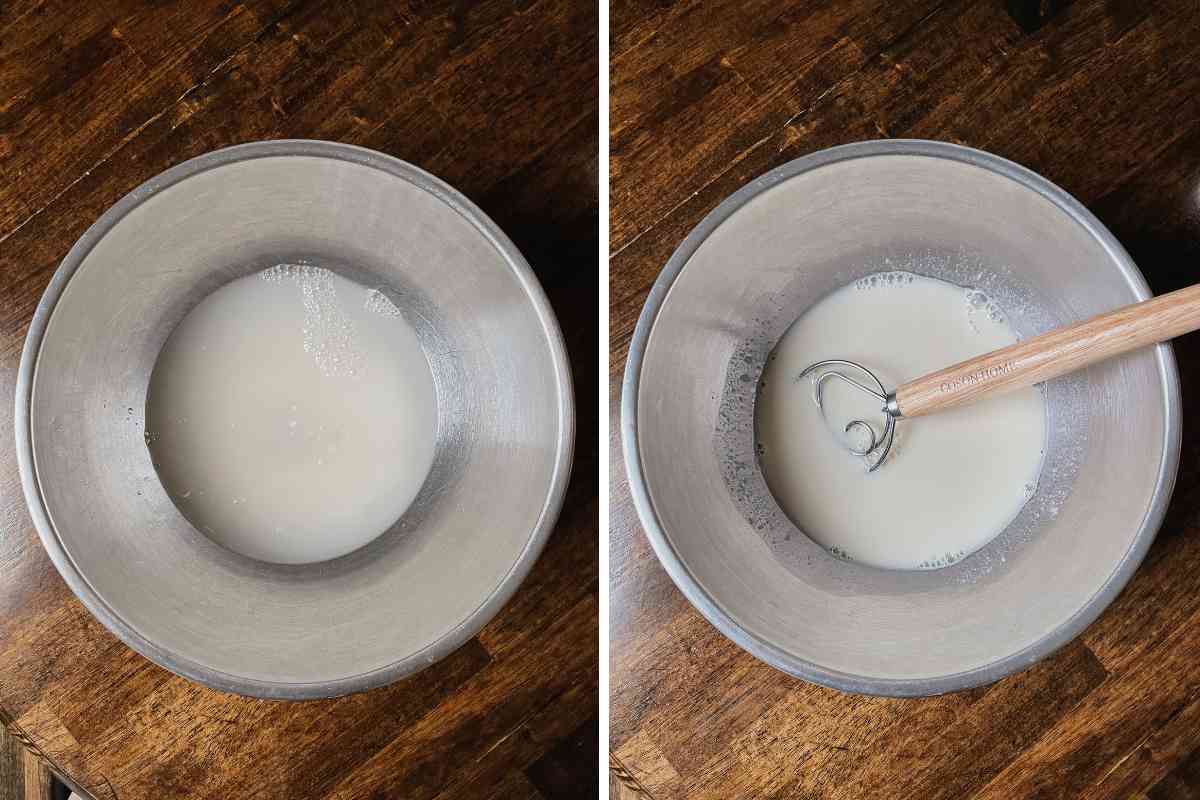
Add salt and flour to mixture and whisk to combine to form dough.
Step 2: Bulk Ferment – Cover bowl with damp kitchen towel. Bulk ferment on counter at room temperature 3-12 hours (or overnight) until dough has risen 50%-75% of its original size. Length of time will depend on the temperature of your kitchen.

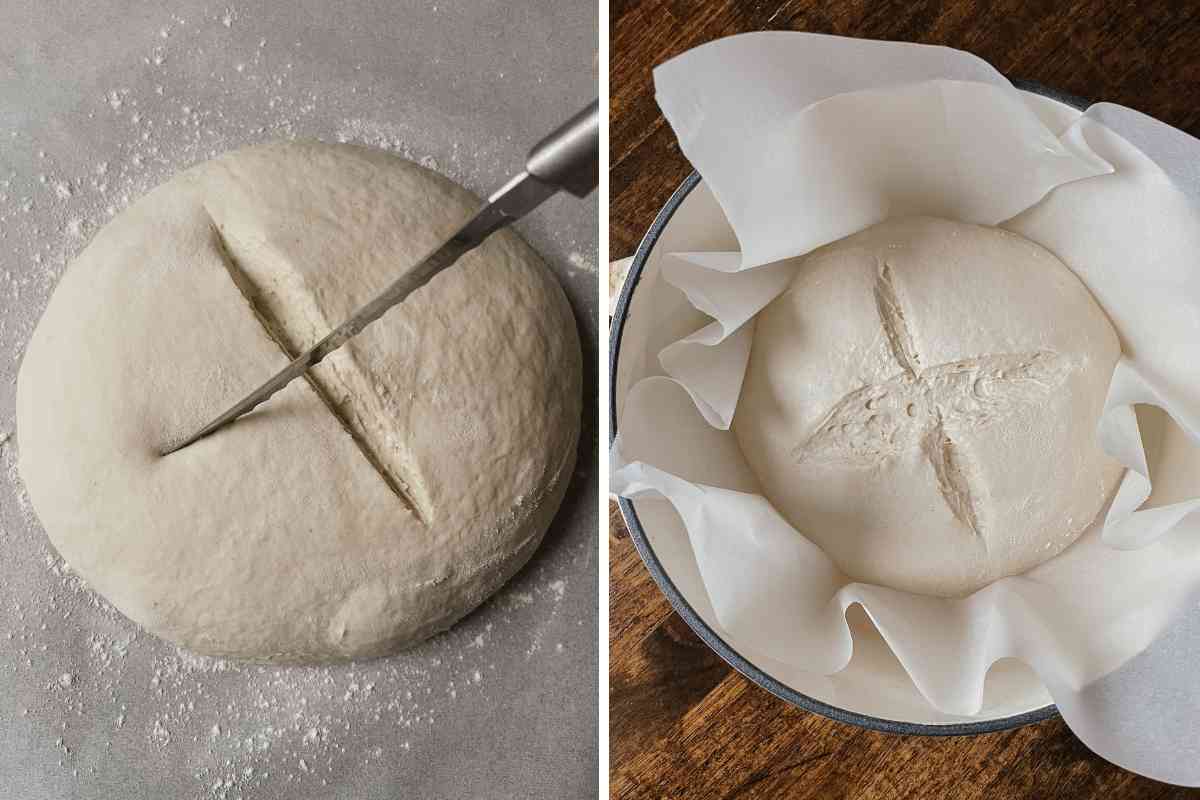
Step 3: Shape Dough – Once fermented, turn dough out onto a lightly floured surface. Shape dough into a ball with your hands. You can do this by pulling the edges of the dough into the center to create a seam. Then flip the dough over so it is seam-side down, smooth side up.
Step 4: Cold Proof in Refrigerator – Place dough onto wax paper or floured tea towel (seam-side up) and place in a medium size bowl (slightly larger than the ball of dough). Cover bowl with a damp kitchen towel and place in fridge for up to 24 hours.
Step 5: Score Dough – When ready to bake, turn the dough out onto parchment paper. Place seam-side down and smooth side up.
Score the top by using a sharp knife to slice the top of the dough. I like to do a simple ‘X’ with this recipe.
Step 6: Bake Dough – Place parchment paper with dough in a cold Dutch oven and cover with the lid. Then place the cold Dutch oven into a cold oven (no preheating). Set the oven temperature to 450℉ and set a timer for 1 hour.
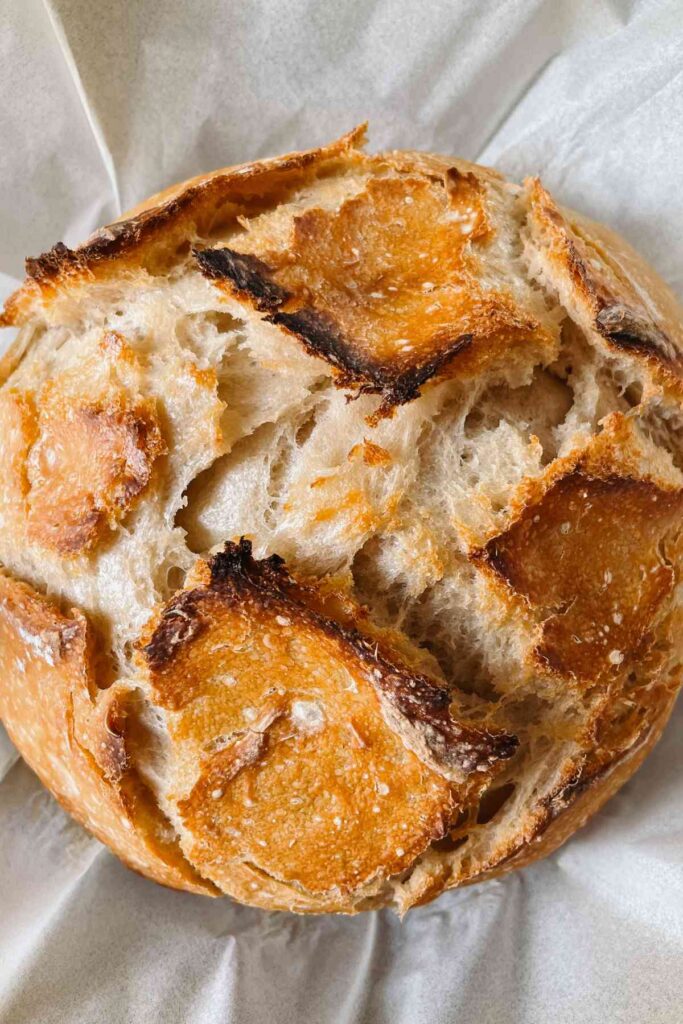
When the timer goes off, lower the temperature to 425℉ and remove the lid. Bake for another 10-15 minutes until the top is browned or until the internal temperature reads 205-210°F (96-99°C) with an instant read thermometer.
Remove the bread from the oven and place on a wire rack to cool. Once fully cooled, slice and enjoy!
Frequently Asked Questions
This unloaf sourdough bread recipe is perfect for beginner sourdough bakers. It’s great for the unfussy sourdough baker with limited time who still wants fresh homemade sourdough bread on the table. This is one of my favorite methods when I’m feeling lazy, want to go to bed right after mixing up the dough, or have limited time. It really can be simple and I hope it takes the stress out of making sourdough bread.
Leave a comment below letting me know how you enjoyed this recipe or if you have any questions!
Looking for more easy recipes? Check out my Easy Chewy Homemade Granola Bars for the perfect after-school snack.
Interested to learn more about Hello Honeycomb? Click here to read more about me!
-
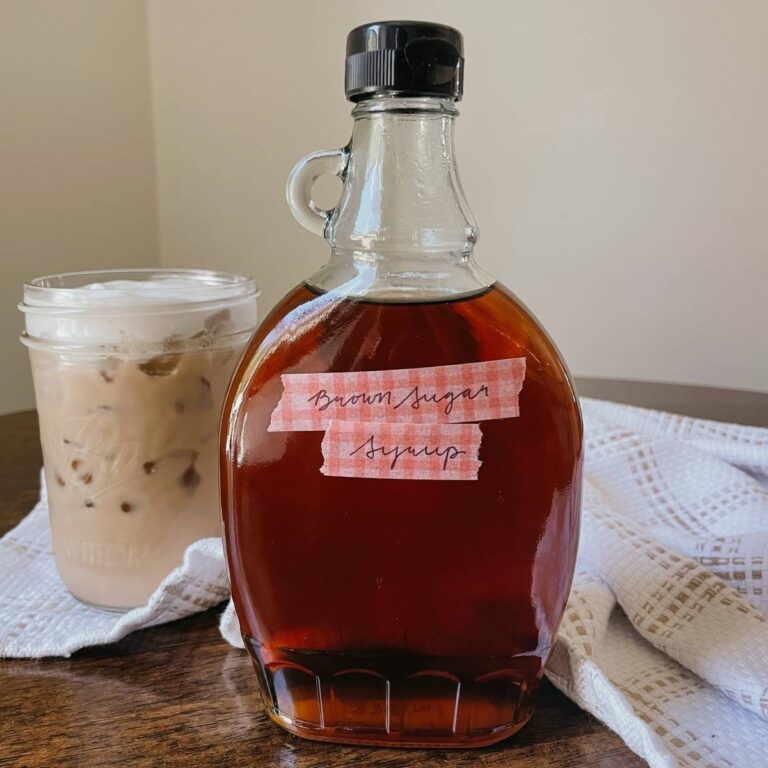
Brown Sugar Coffee Syrup
This brown sugar coffee syrup is made with 4 simple ingredients: water, brown sugar, vanilla extract, and salt. Whip up a batch in 5 minutes!
-
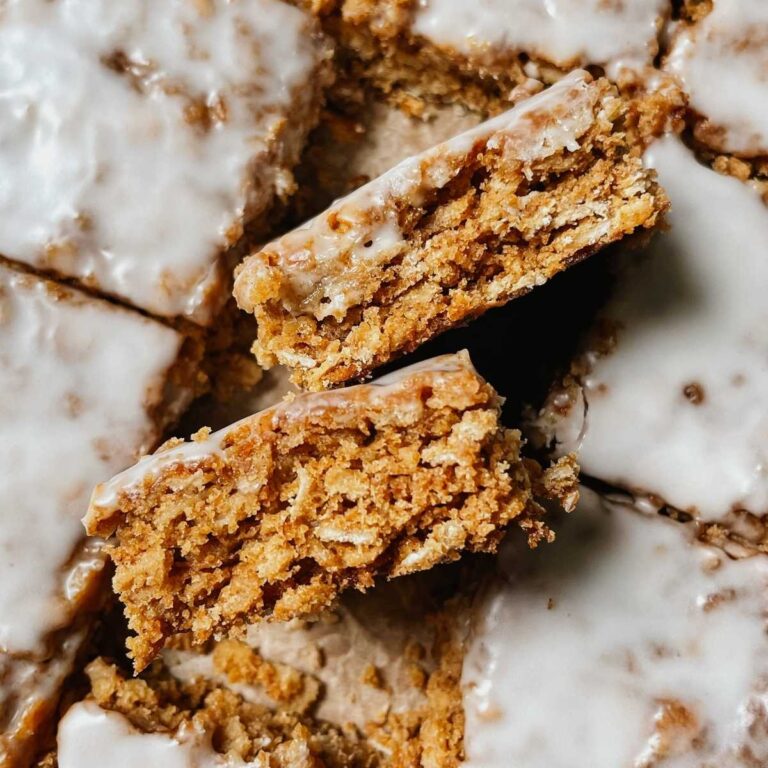
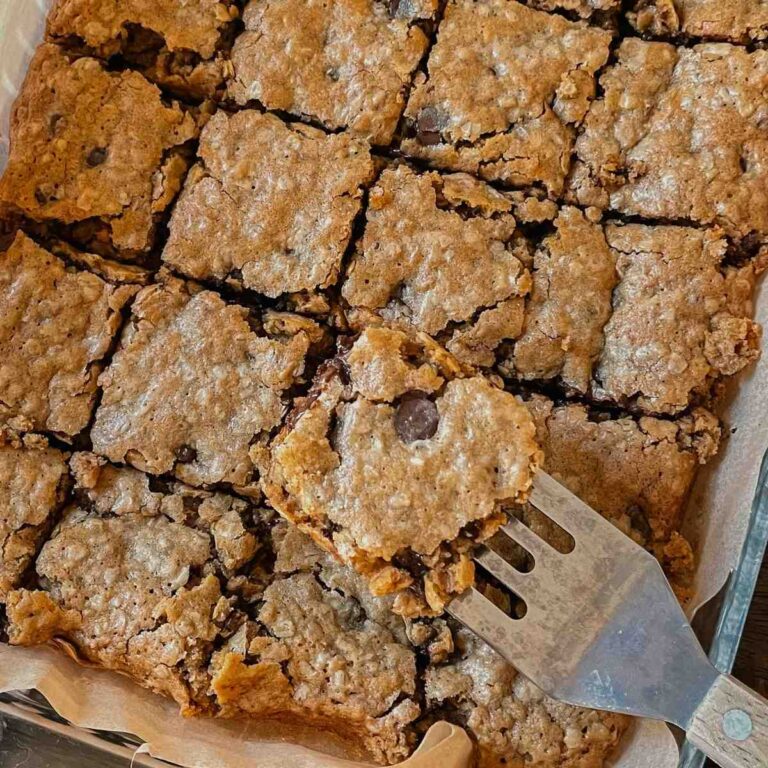
Sourdough Iced Oatmeal Cookie Bars
These sourdough iced oatmeal cookie bars are soft and chewy. A quick and easy recipe made with sourdough discard and simple vanilla icing.
-
Sourdough Peanut Butter Oatmeal Chocolate Chip Cookies
These sourdough peanut butter oatmeal chocolate chip cookies are all your classic favorites rolled into big, fat, chunky cookies!
-
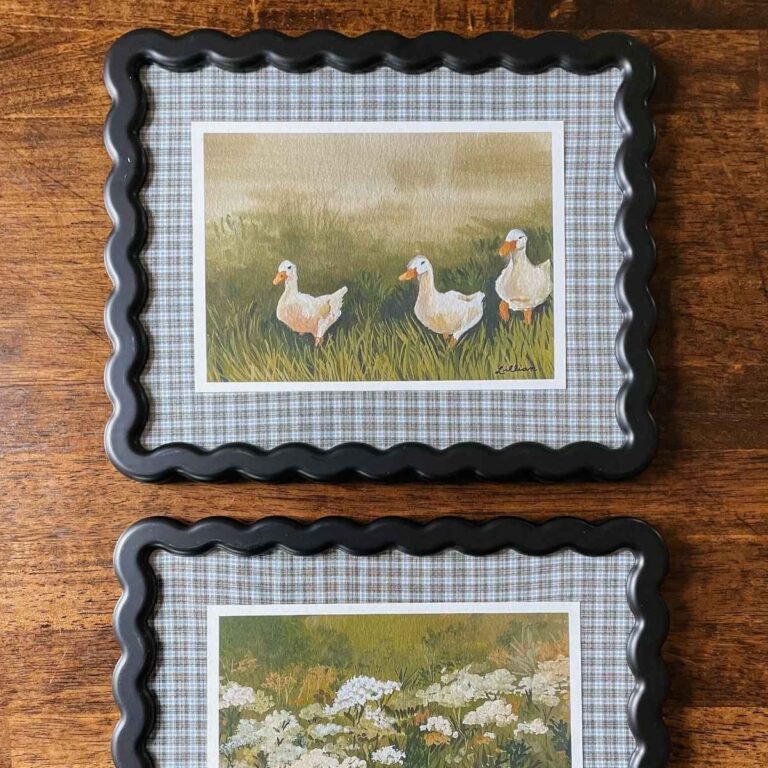
DIY Fabric Picture Frame Mats
How to make DIY fabric picture frame mats with fabric, glue, and a pair of scissors in less than 15 minutes. Easy step by step tutorial!
-
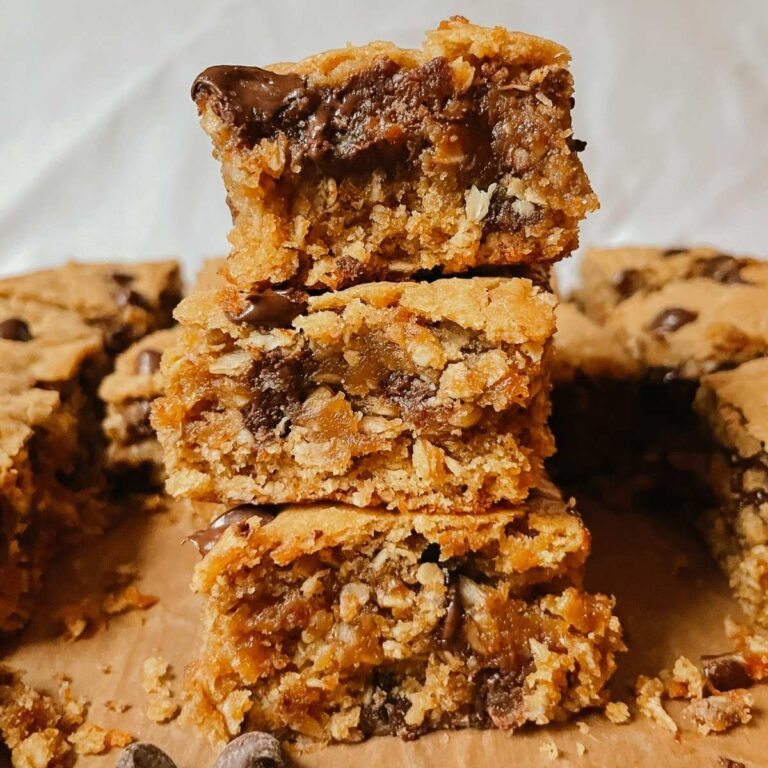
Sourdough Peanut Butter Oatmeal Chocolate Chip Cookie Bars
Sourdough peanut butter oatmeal chocolate chip cookie bars are all your favorite cookies rolled into big, fat, chunky cookie bar squares!
-
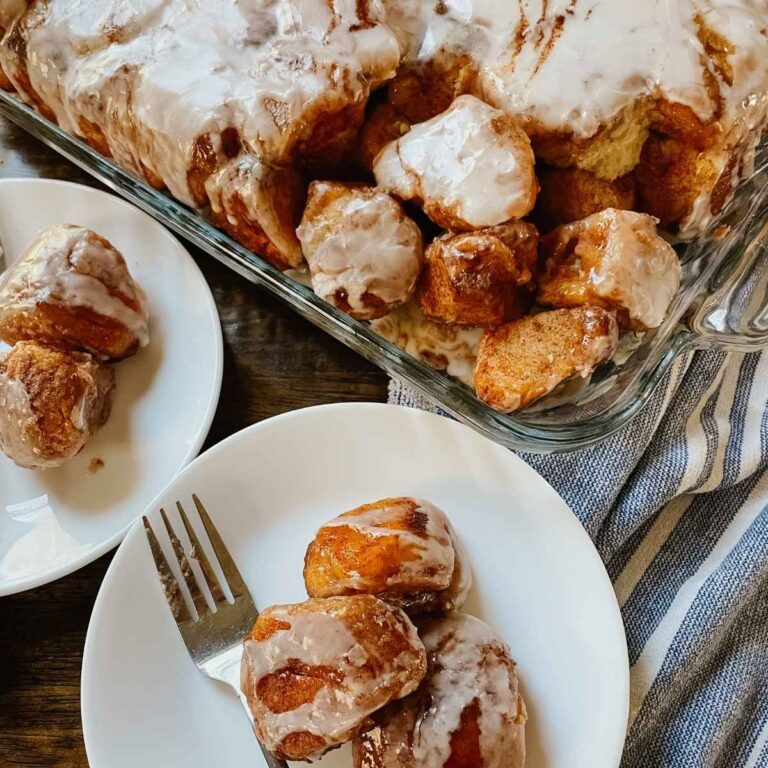
Sourdough Brown Butter Monkey Bread (9×13 Pan Recipe)
This sourdough brown butter monkey bread is a sweet, gooey, and tangy same day sourdough treat. It’s a large batch recipe made in a 9×13 baking pan–no bunt pan required!


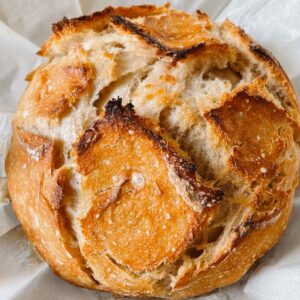
This is my tried and true sourdough recipe. I love the simple, rustic look of this bread and how easy it is to make. Leave me a comment with any questions and I’ll get back to you as soon as I can!
can inclusions be added to this loaf recipe? if so, at what stage would be the best time to add?
Hi, Natasha. Inclusions can be added during shaping before baking!
I really like the “unloaf” method you explain here. It makes sourdough more accessible!
OK – I’m going to try this tonight! My starter needs feeding but I’d love bread tomorrow for lunch 🙂 I hadn’t heard of this method before so I’m keen to try it.
Do you have any photos of a slice of the bread when cooked?
Hi, Jo! I don’t have any photos of this loaf sliced, but I haven’t noticed a huge difference in the crumb on this method versus the traditional sourdough method. My family likes both as long as there is a good rise. Let me know when you try it!
I love this easy method to make sourdough bread. Thank you! The rest were too daunting. However, the loaf is kinda big. Can it be separated into two loaves? Would baking time be the same?
Hi, Dina! I’ve never personally tried splitting this into 2 smaller loaves, but there are readers who have. Simple make as directed and when shaping, divide into 2 smaller loaves. I would adjust the baking time down to compensate for the smaller size. You can always add more time if needed.
Thank you for sharing this! I dont regularly have / make time for the full process, with this method my starter no longer just sits in the fridge.
Easy to follow and comes out perfect!
You’re so welcome, Amy! I’m happy it fits into your schedule. 🙂
sourdough is my favorite!! this is abgorgeous photo of your bread loaf!
Thank you, Kayla! Sourdough is our favorite, too.
nice easy recipe!
Can you do inclusions with this recipe
Hi, Jesse! Yes, you can add inclusions. Since this is a no-knead sourdough bread recipe (no stretch and folds), add them after the bulk fermentation.
Lay your dough out and press it into a large square and sprinkle inclusions on top. Fold the dough over itself/roll it up and shape it.
Thank you, Ophelie!
Very easy to follow recipe and the sourdough turned out amazing!
So glad you loved it!
Can’t wait to try this recipe! Looks so simple and yet SO tasty!
Thank you, Kayly!
Never heard of this unload method, trying it this weekend!
Hi, Nikki! Easiest sourdough method ever, right?!
We skip a lot of steps in our sourdough baking too! Love to see simple recipes!
It truly takes the stress out of sourdough to just get back to the very basics.
Love this recipe. I make my fresh milled flour bread like this too. It’s my favorite way to make bread. I don’t much care for recipes that require a lot of fussing and fancifying. This is perfect for when you’re busy and don’t have a kitchen, lol. Absolutely 5 stars!
Thanks so much, Heidrun!
Heidrun, Using this recipe with your fresh milled? thanks!
This looks so easy and so delicious!!
Thank you, Ashlei!
love how simple this is! thank you for sharing!
Thanks, Kayla!
Love this idea of recipe! fast, efficient and accessible!
Thank you so much! That is definitely what is needed to simplify sourdough.
Trying this tonight! Do you think it would be possible to use the open bake method with an unloaf? My Dutch oven was clay and broke 🙁
Oh no, I’m sorry to hear about your Dutch oven! I’ve never tried an open bake so I can’t say for sure. I’ve always used my cast iron Dutch oven. Let me know how the open bake went.
Yum, Annabelle! what a fantastic “unloaf” recipe! Can’t wait to try it out!
Thank you, Penny! I hope you enjoy it as much as we do.
I am looking forward to trying this recipe! I was wondering can you add garlic cloves to this recipe and if so in what part of the process would you do that?
Hi, Kristi! You can add any inclusions you want and since this is a no-knead recipe I would add them after the bulk fermentation. Lay your dough out and press it into a large square and sprinkle inclusions on top. Fold the dough over itself/roll it up and shape it before baking.
For garlic cloves, I would suggest chopping them a little so they more evenly distribute in the dough. I’ve never tried garlic cloves so let me know how it turns out!
Thank you!
I am roasting the garlic first and will cut them up before adding and I will definitely let you know how it turns out.
Would the process be the same if I were to use a loaf pan instead of my Dutch oven?
Hi, Arianna. Yes, the process would be the same up to the shaping. You’d just shape and bake in your loaf pan (or pans) as you normally would for other sourdough loaf pan recipes. Happy baking!
So easy to do !!! Thank you so much for the recipe!!
You are so welcome, Lisav! So glad you enjoyed it.
Hi, I’m wondering if bread flour would be a good option, or is it better to stick to bleached regular? Thanks!
Hi Sarah, you can use unbleached bread flour for this recipe! Whatever flour you use, just make sure it is unbleached.
My new go-to sourdough recipe!! This recipe is truly so easy, especially as a mom with my hands full. I’ve made this at least 5 times now for both my family and as gifts and it never disappoints. It performs so well with both a cold start and a preheated dutch oven. Thank you so much for sharing!
5 times?! Amazing, Morgan! So glad it’s been helpful. It makes sourdough baking as a busy mom even easier. Thanks so much for sharing!
Just made this beautiful bread this morning. Im brand new to making sourdough and this is an easy way to introduce myself to sourdough bread making. It looks great! My husband said it looks like a professional baker made it. We are waiting to cut into it. It will be delicious Im sure. Thank you for such an easy recipe.
So glad to hear, Jane! Welcome to the sourdough family. 🙂
Have you ever made mini loaves with this recipe? If so, how many “minis” did you make and how was the baking time affected?
Hi, Kim. I’ve never made mini loaves with sourdough so I would find instructions for mini loaves and divide, shape, and bake this recipe as instructed for mini loaves. This recipe will be fine to divide into mini loaves since it’s a standard sourdough recipe. Sorry I can’t provide more specific help!
Just finished making your sourdough cinnamon roll focaccia and it was heavenly. I’ve had a starter for well over a year and this is the first recipe I have made that I can say turned out perfectly. I added finely chopped walnuts to the cinnamon mixture.
I’ve got my eye on your coffee cake recipe next. It looks incredible. Thank you for sharing your recipes.
I love this recipe! I top mine with TriColor Sesame Seeds, make it in Cast Iron Loaf Pans.
If doubling, do you double the salt as well?
Hi, Janet. Yes, for doubling the recipe, double everything including the salt! Please let me know how it turns out for you. 🙂
So easy. This is the best easy unloaf recipe I’ve made. Turns out well each time.
Thanks, Georgia! It’s definitely a tried and true easy unloaf recipe!
This is such a great recipe! Delicious and perfect for us lazy bakers
Gorgeous loaf, looks delicious!
Such an easy & delicious way to make sourdough without trying to follow all the “rules”! I make unloaf sourdough bread all the time and it always turns out!
I’ve never made sourdough this way but I’m definitely giving this a try. I can’t wait to try this easier way to make sourdough bread!
Incredible! The other sourdough recipes out there are so daunting. This was the first one I tried. My first loaf cake out fantastic. My second had user error problems. I failed to set the temperature hot enough. Its still being as I type. I hope it’ll still turn out ok. Is there a sandwich version of the unloaf?
Hi, Dina. I’m so glad you love the unloaf! I haven’t made a sandwich version of the unloaf but that is a great idea. I’ll have to work on that for the future!
This is an Amazing Recipe..
You will not be disappointed at all..
I will make this several times a month..
its delicious
So wonderful to hear, Mary! Thank you for sharing.
Hi, I did all directions how you wrote!! The next morning when trying to remove dough from wax paper, which was covered with damp towel, the paper was 100% stuck to the dough!! Couldn’t remove but a tiny bit. I gave up and am baking it now. What went wrong?
Oh no, Mare! I’m so sorry to hear that your wax paper stuck to the dough. I’ve never had that happen before so perhaps it was the brand of wax paper? Maybe it was too thin or not thickly waxed.
Next time I’d just place the dough directly in a lightly greased bowl overnight and skip the wax paper altogether. How did it turn out after baking?
Hi does it have to be unbleached flour? No all purpose flour or bread flour ? I only have these 2 flours
Hi, JoAnn. You can use either one of those flours but the result may not be the same. You would just have to experiment. I have always found unbleached flour to be the best for sourdough. Of the 2 flours you mentioned, I’d use the bread flour.
Hello Annabelle
At last I found a sourdough recipe that I have been successful with, after 14 months of trying.
I’m going to experiment with adding a small of wheat or rye or spelt flours, to enhance more flavour.
Thank you for sharing Hardeep
Hello and so glad to hear you found success with this recipe!
Can you use sourdough right out of the fridge?
Hi, April. I always bring my sourdough starter/discard to room temperature before using it in a recipe. I want to avoid an under-proofed loaf.